

How to build your own mechanical watch
How to build your own mechanical watch
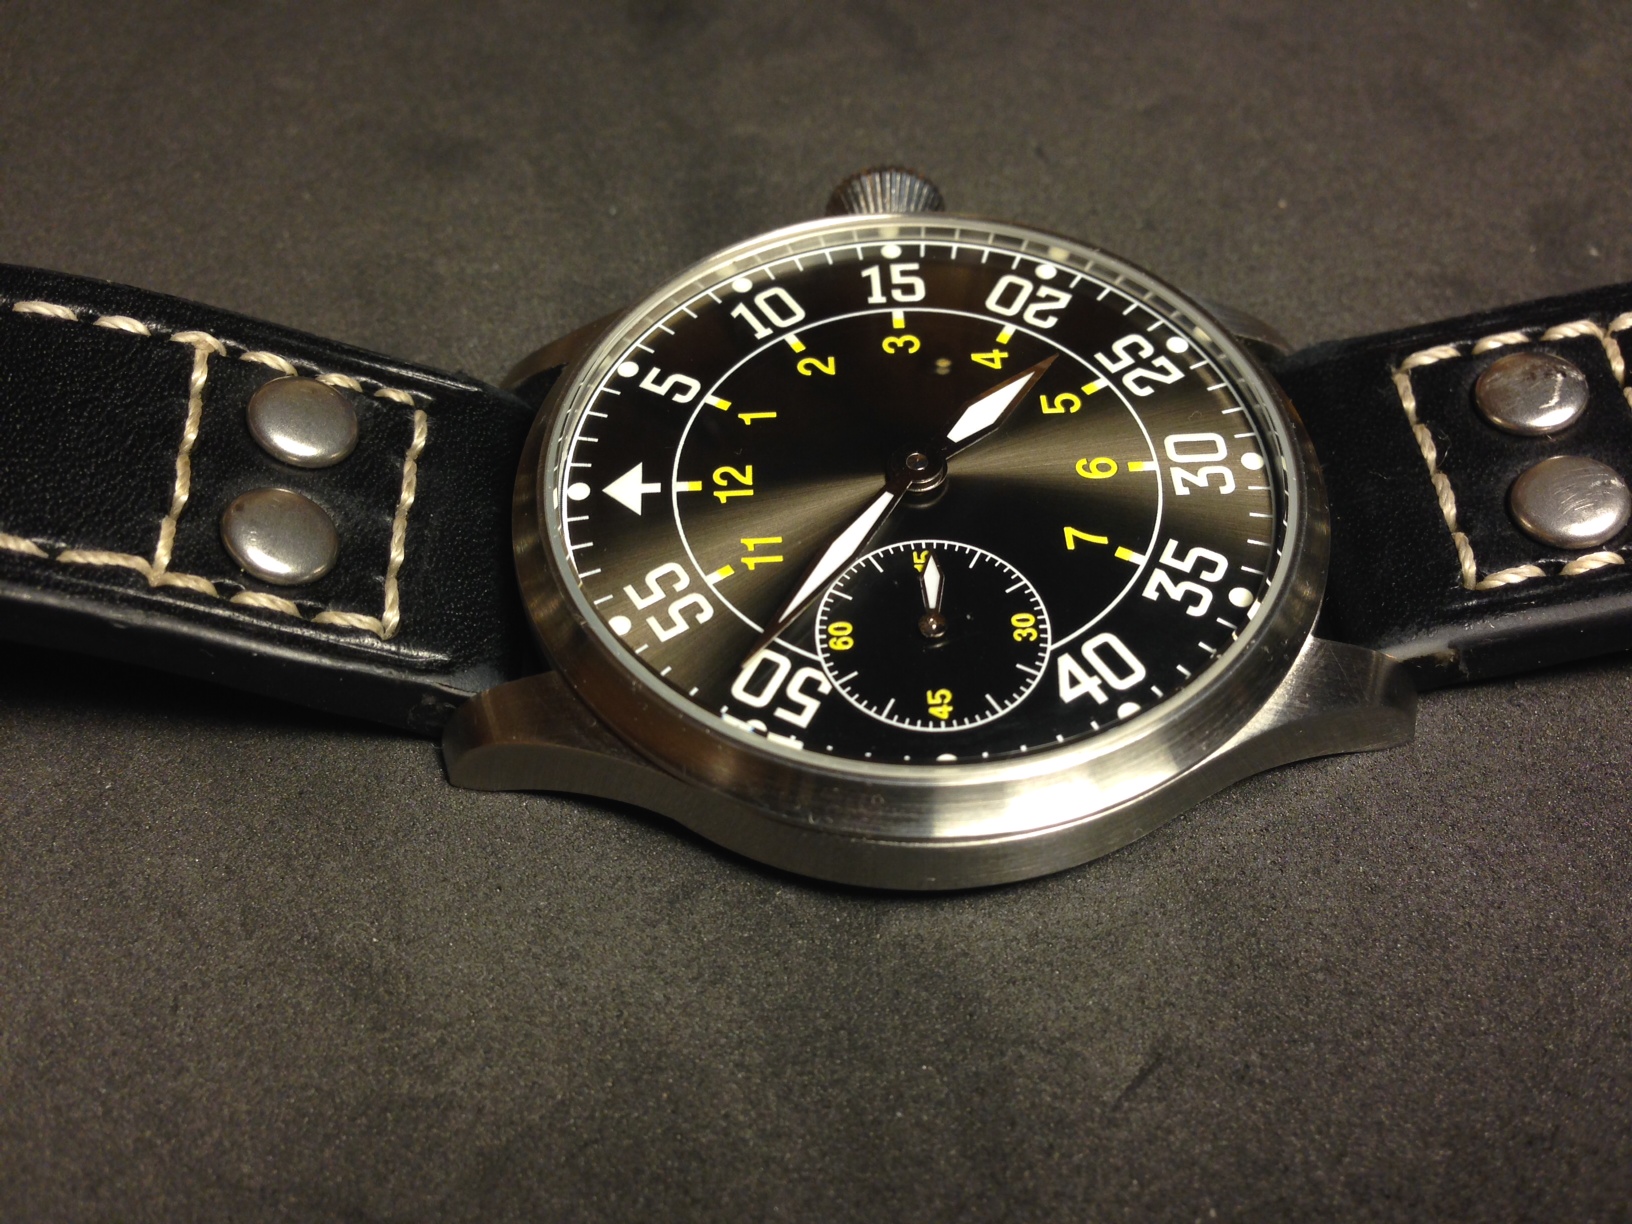
Have you ever wanted to build your own watch? Something unique and specific to your tastes? Maybe you’ve seen watches that had a great dial and case, but the hands weren’t quite right? Well, with a little research on the internet, some mechanical know-how and a fair bit of patience, you can build your very own bespoke watch. For this watch, I wanted to try a B-Uhr style Flieger and the end result was better than I could have imagined. These are the steps I took to make it happen.
Step 1: Finding the Parts
The first step to building your custom Flieger is sourcing the parts. You’ll need to find the following:
A MOVEMENT
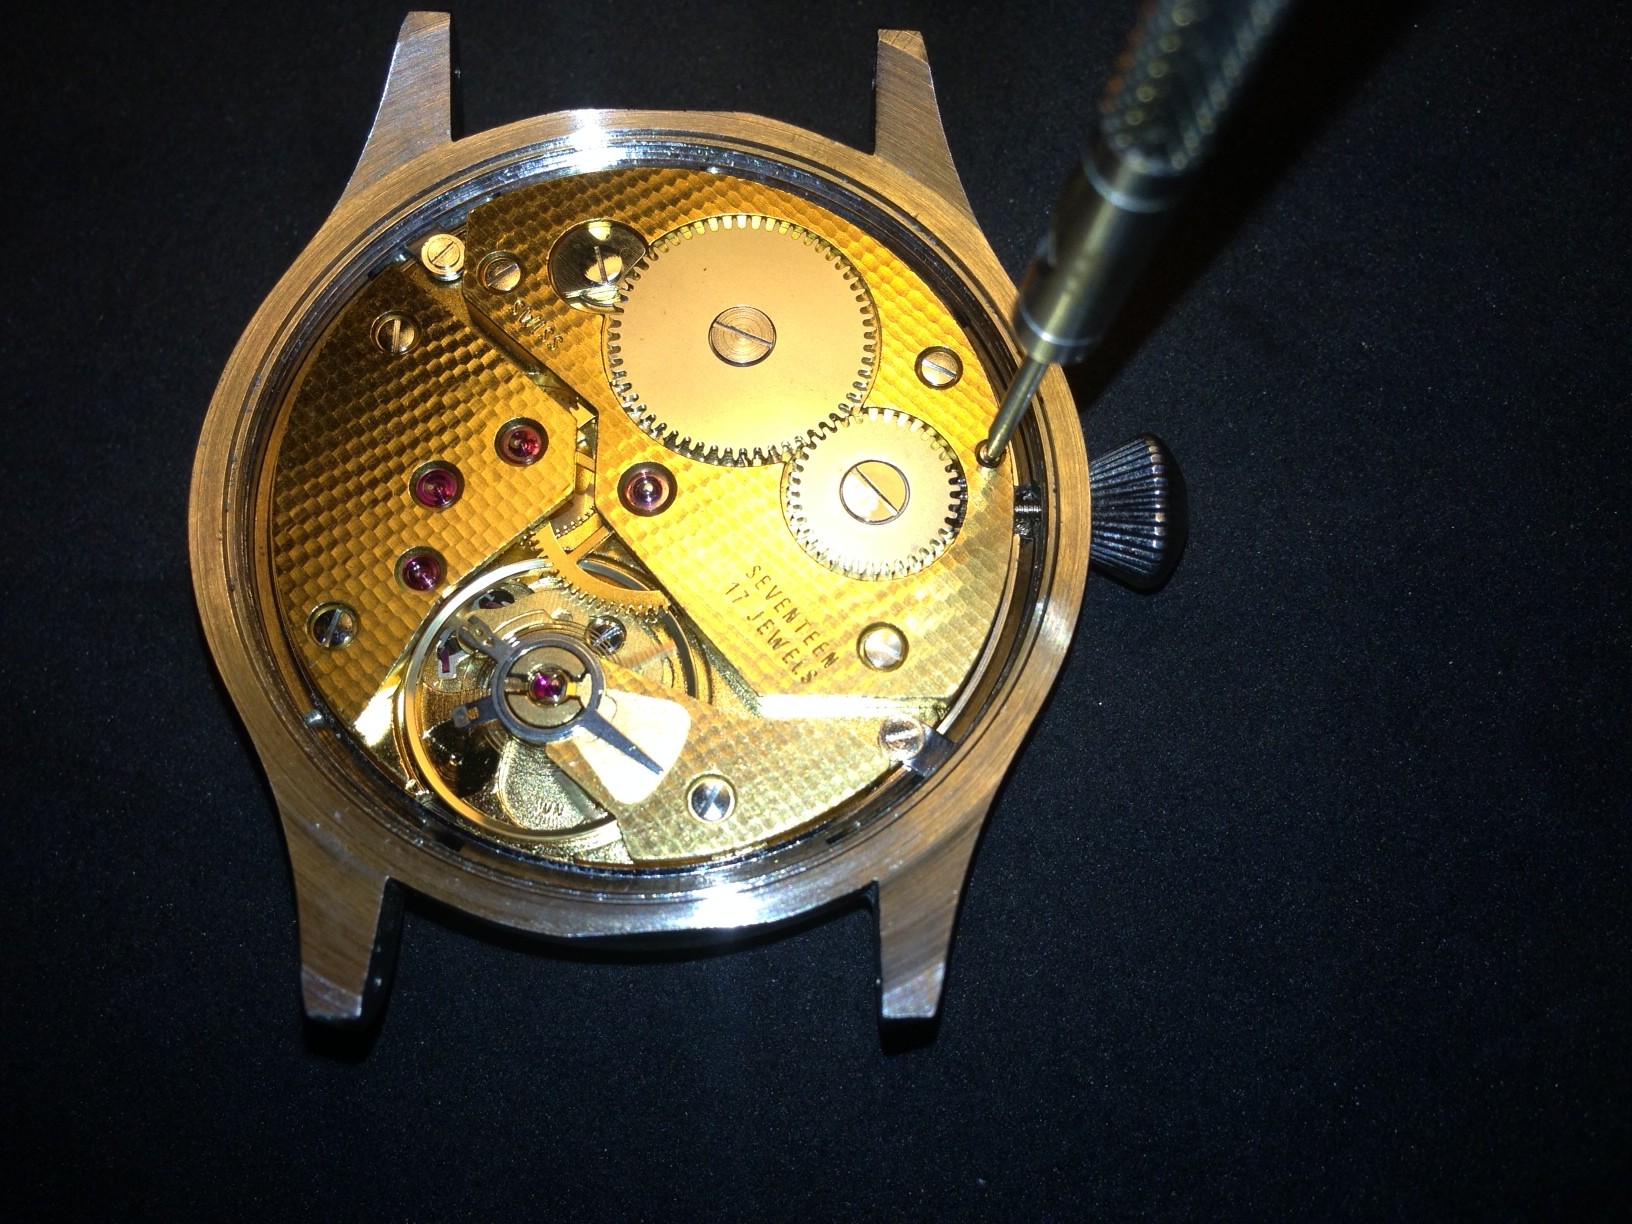
 You’ll want to figure out the movement first since this will determine the layout of the dial and the second hand position. The movement I used for my watch is an ETA 6497, which has its second hand located at the 9 o’clock position. If you would rather have your second hand at the 6 o’clock position you can get the ETA 6498 instead.
ETA movements are getting harder to find these days since ETA has decided to stop supplying their movements to third parties. Despite the shortage, you can still buy them through Otto Frei and sometimes find them on eBay. The price depends on the level of decoration you want. I ordered the gold-toned movement with a hammered finish for $169.00.
A CASE
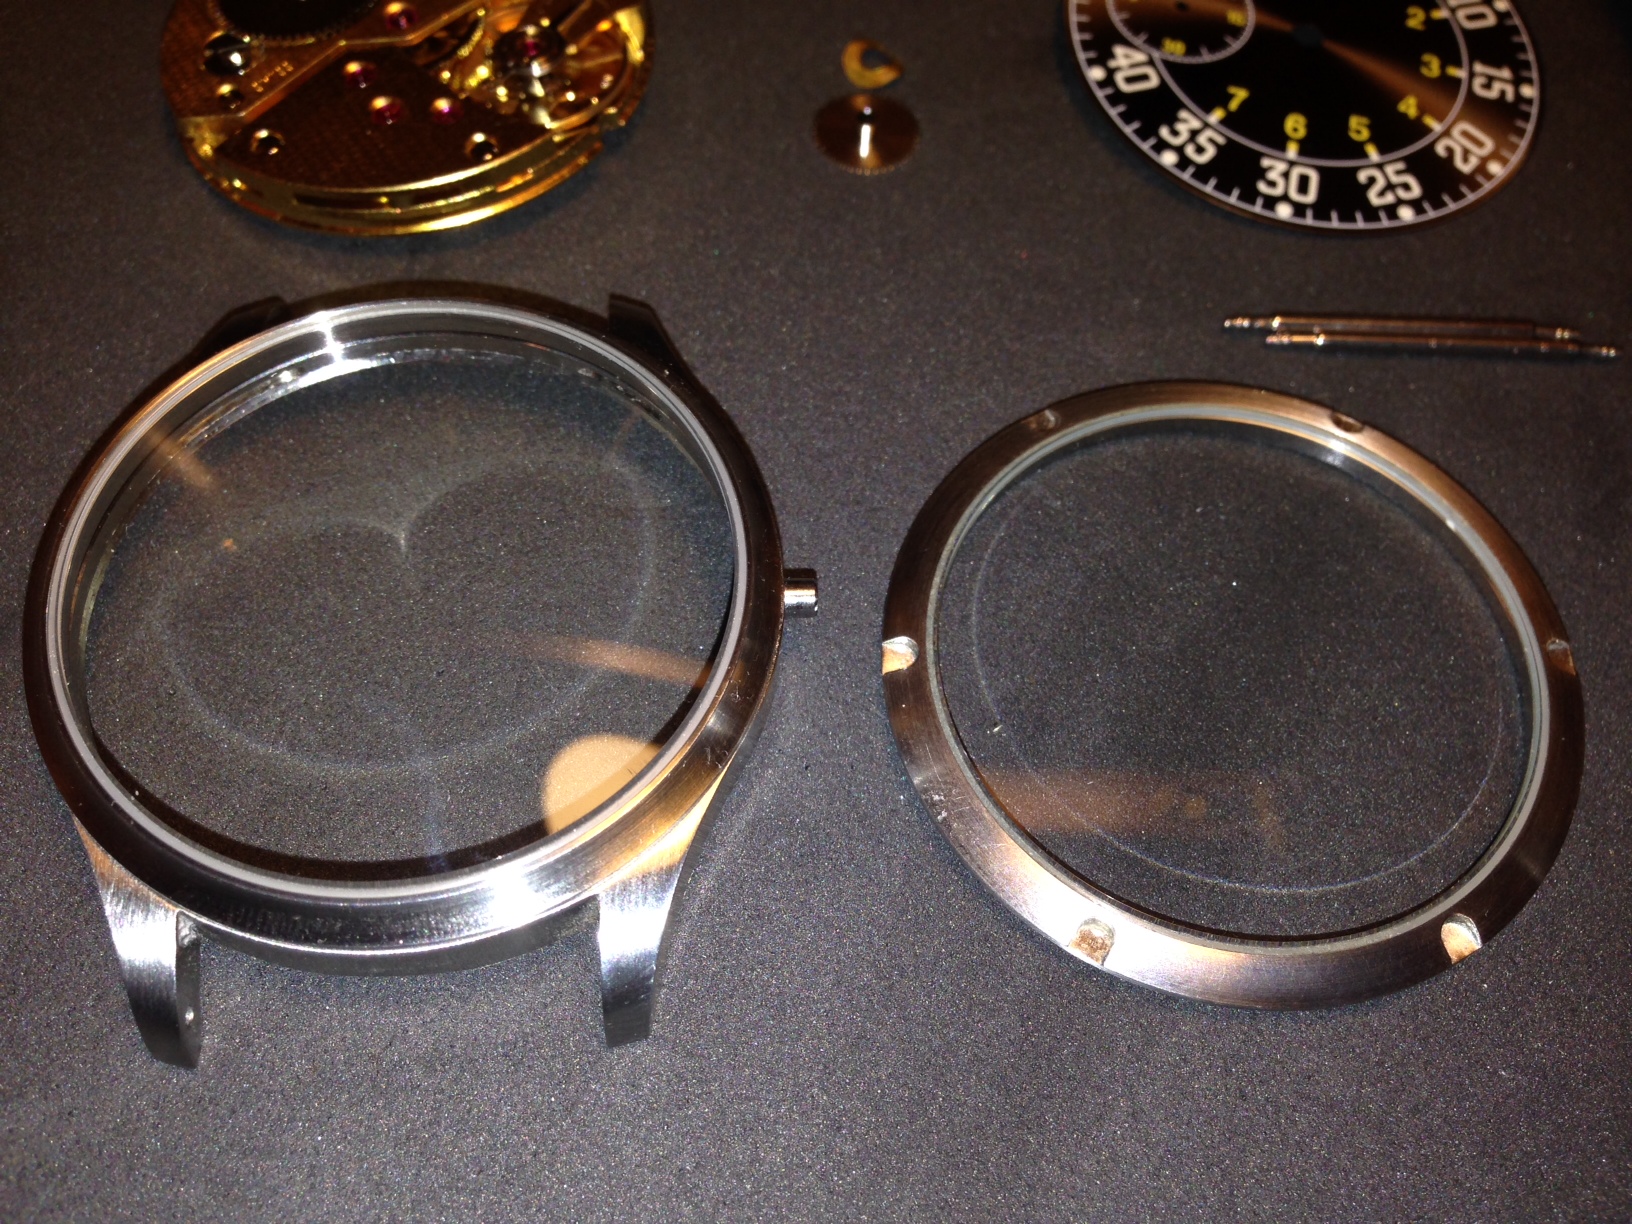 For the case, it needs to be compatible with the ETA 6497/6498 movement. I went with a Solid Steel B-Uhr style case from HelenaRou. This case is available with mineral crystal glass for $49.95 or sapphire for an additional $40.00.
DIAL & HANDS
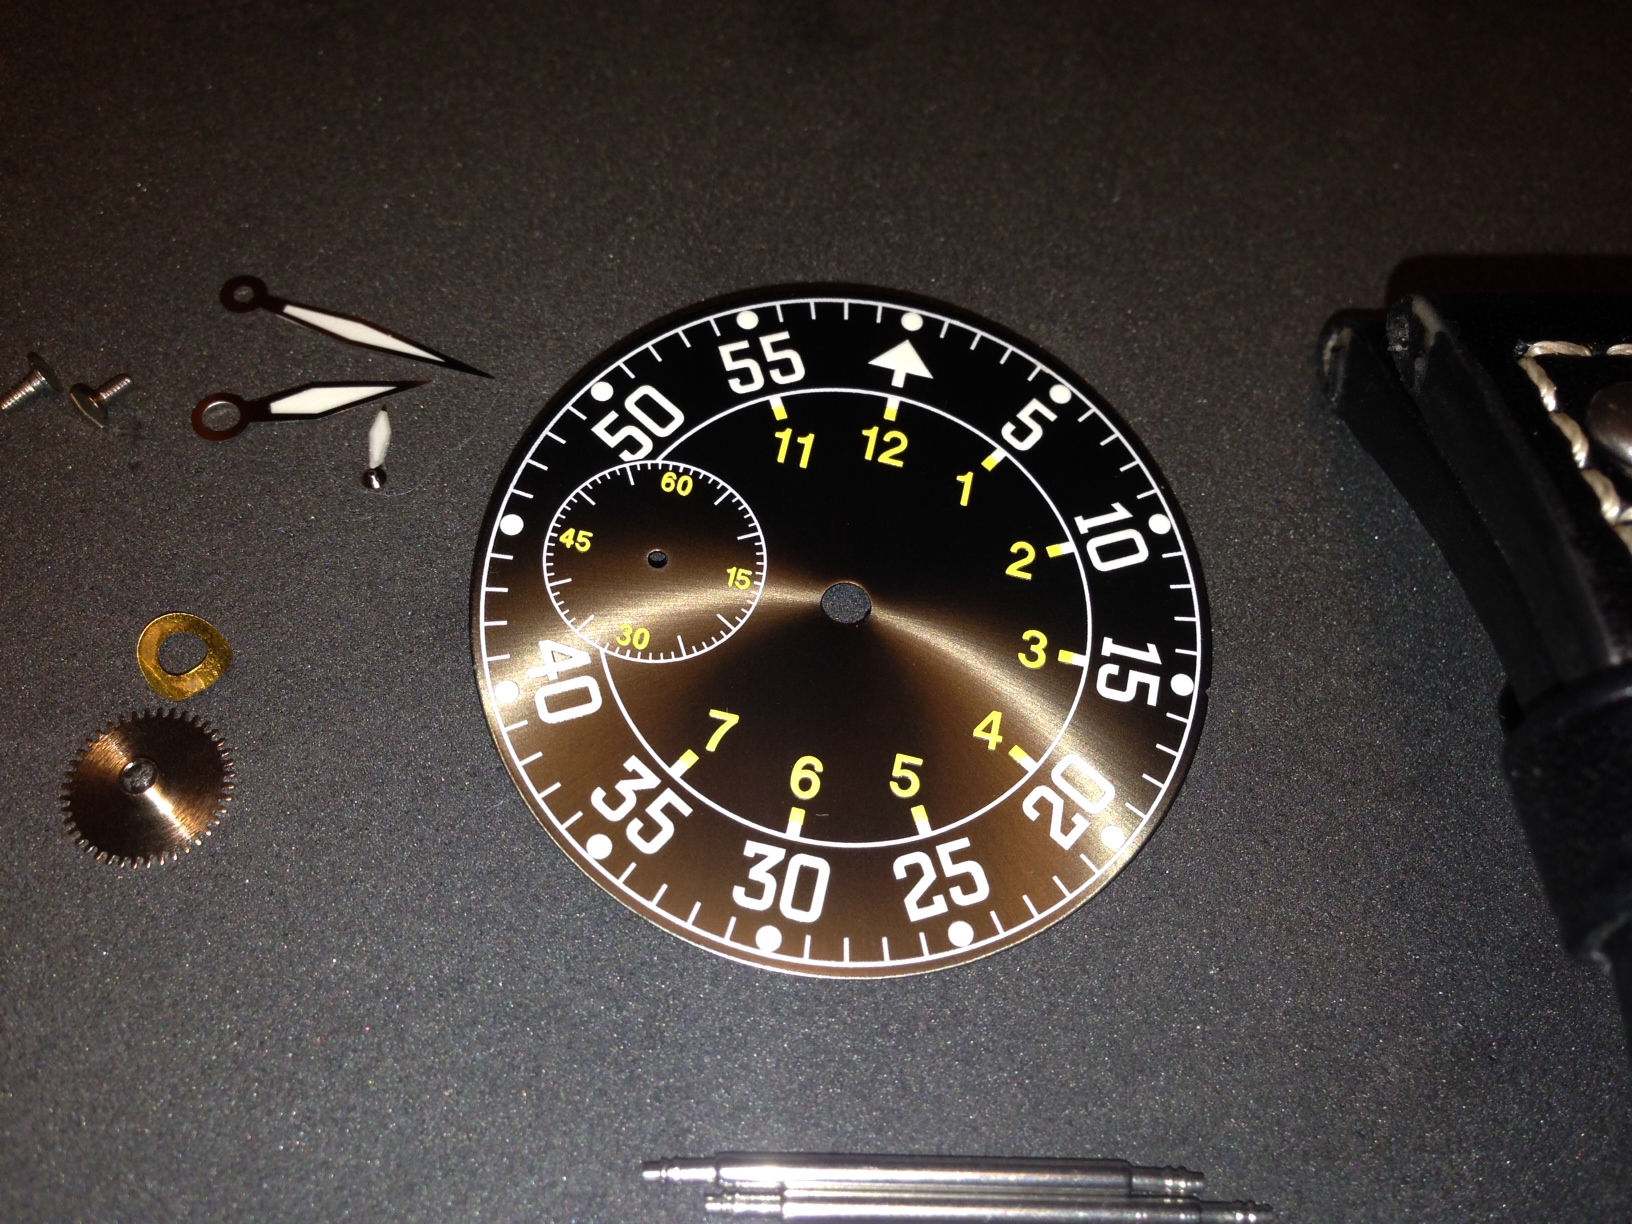 Since I was already getting my case from HelenaRou, I decided to get my dial and hands there as well. I went with the Black Sunray Dial ($24.95) and Silver Anodized superlume hands ($15.50).
STRAP
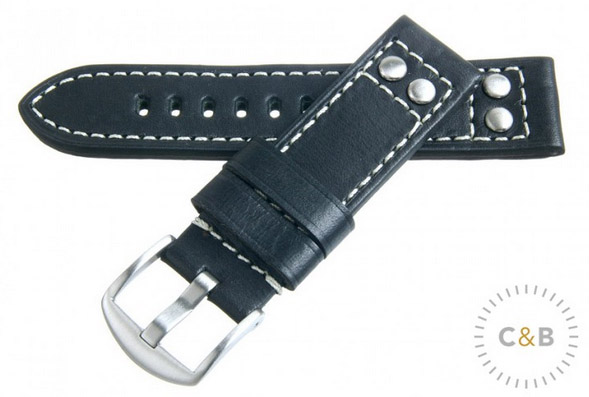
For the strap, I went with the 22mm Black Calf Flieger Strap from Crown & Buckle. I paid $30.00 for mine, but it’s currently on sale for $17.50. That’s an amazing price for a calfskin leather strap.
MISCELLANEOUS
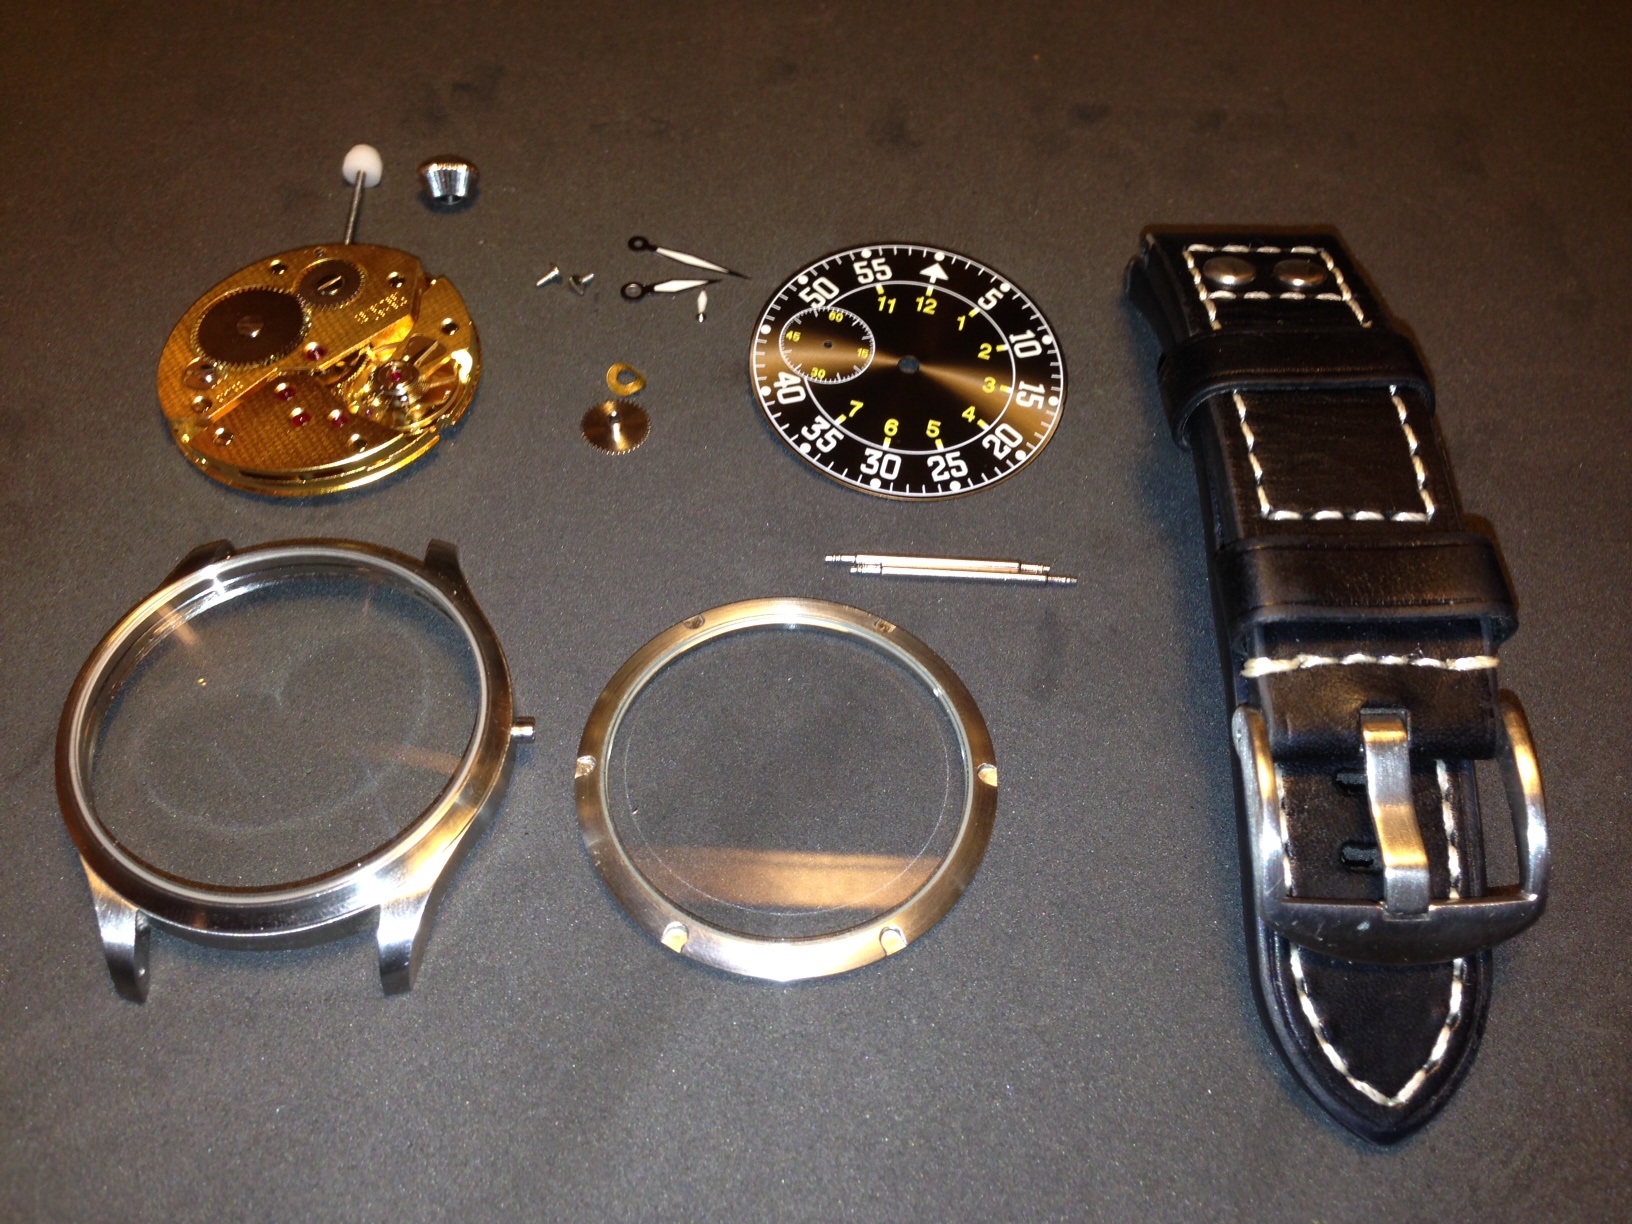
You’ll also need 22mm spring bars and Mounting Tabs for the movement.
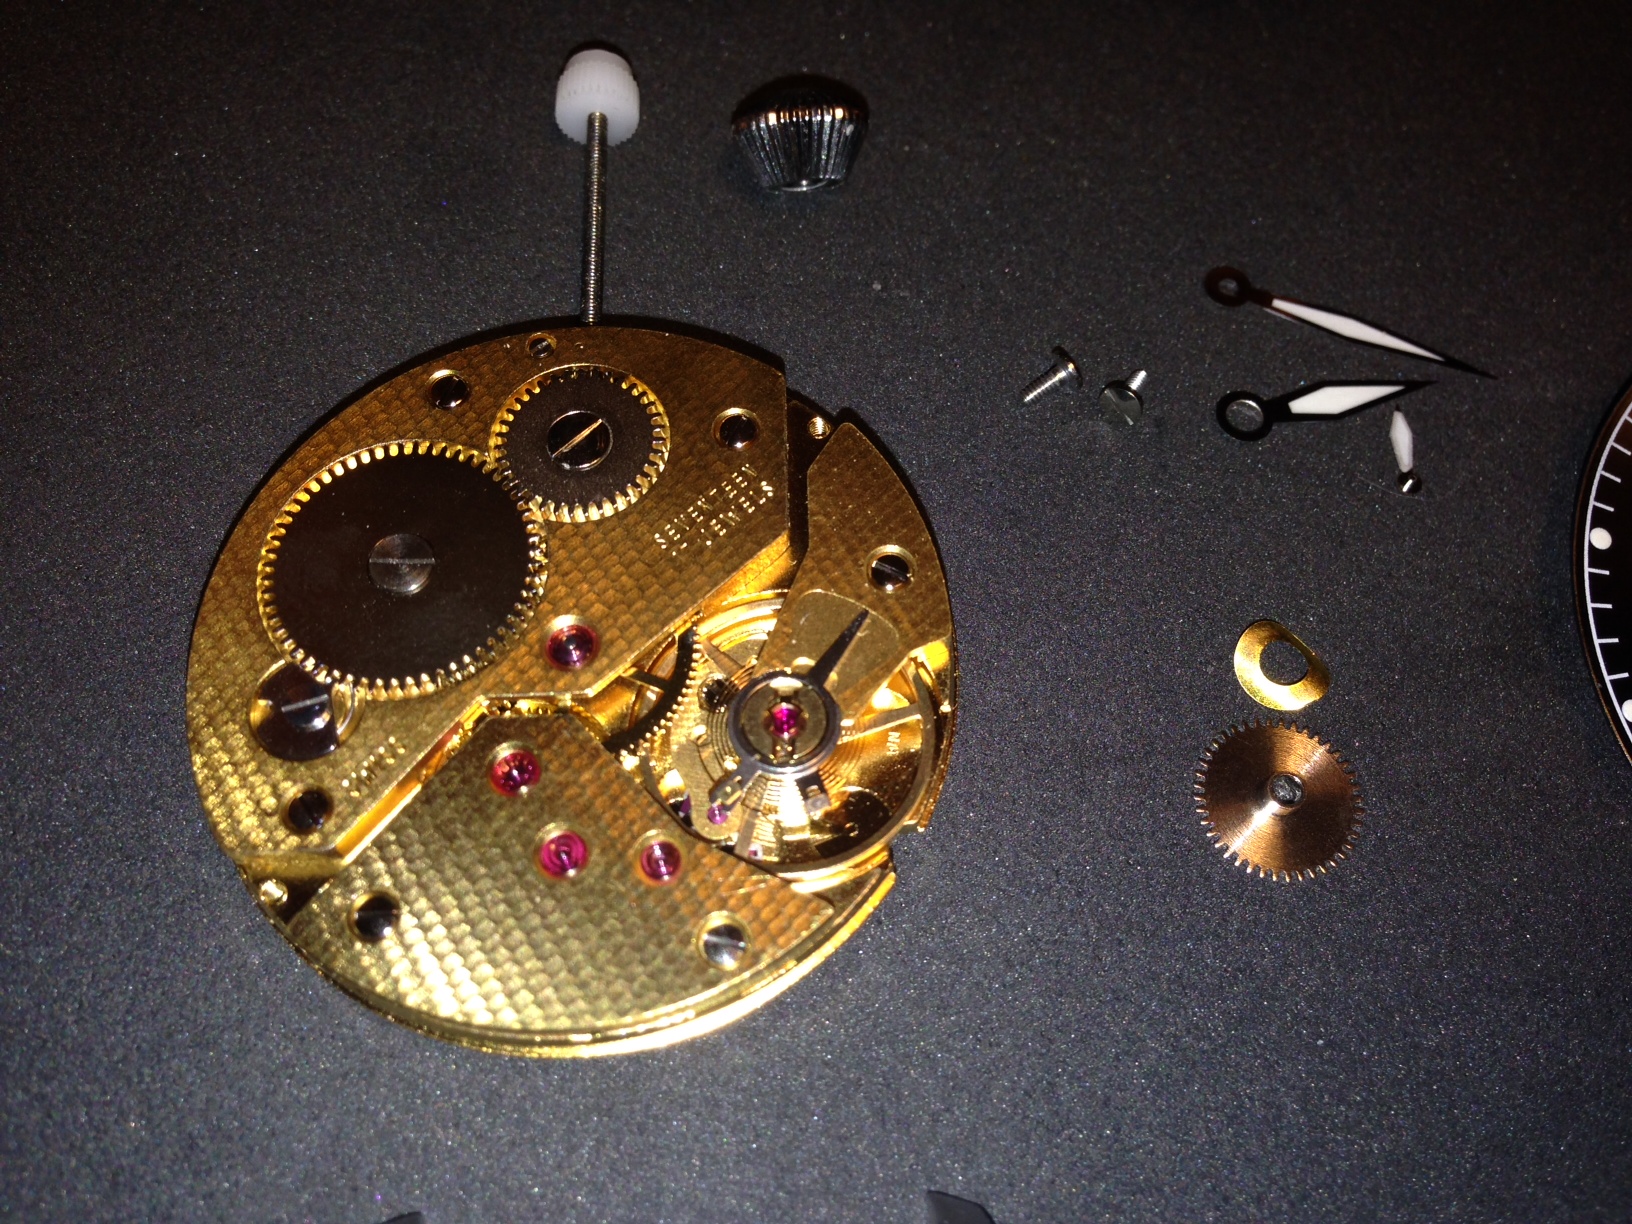
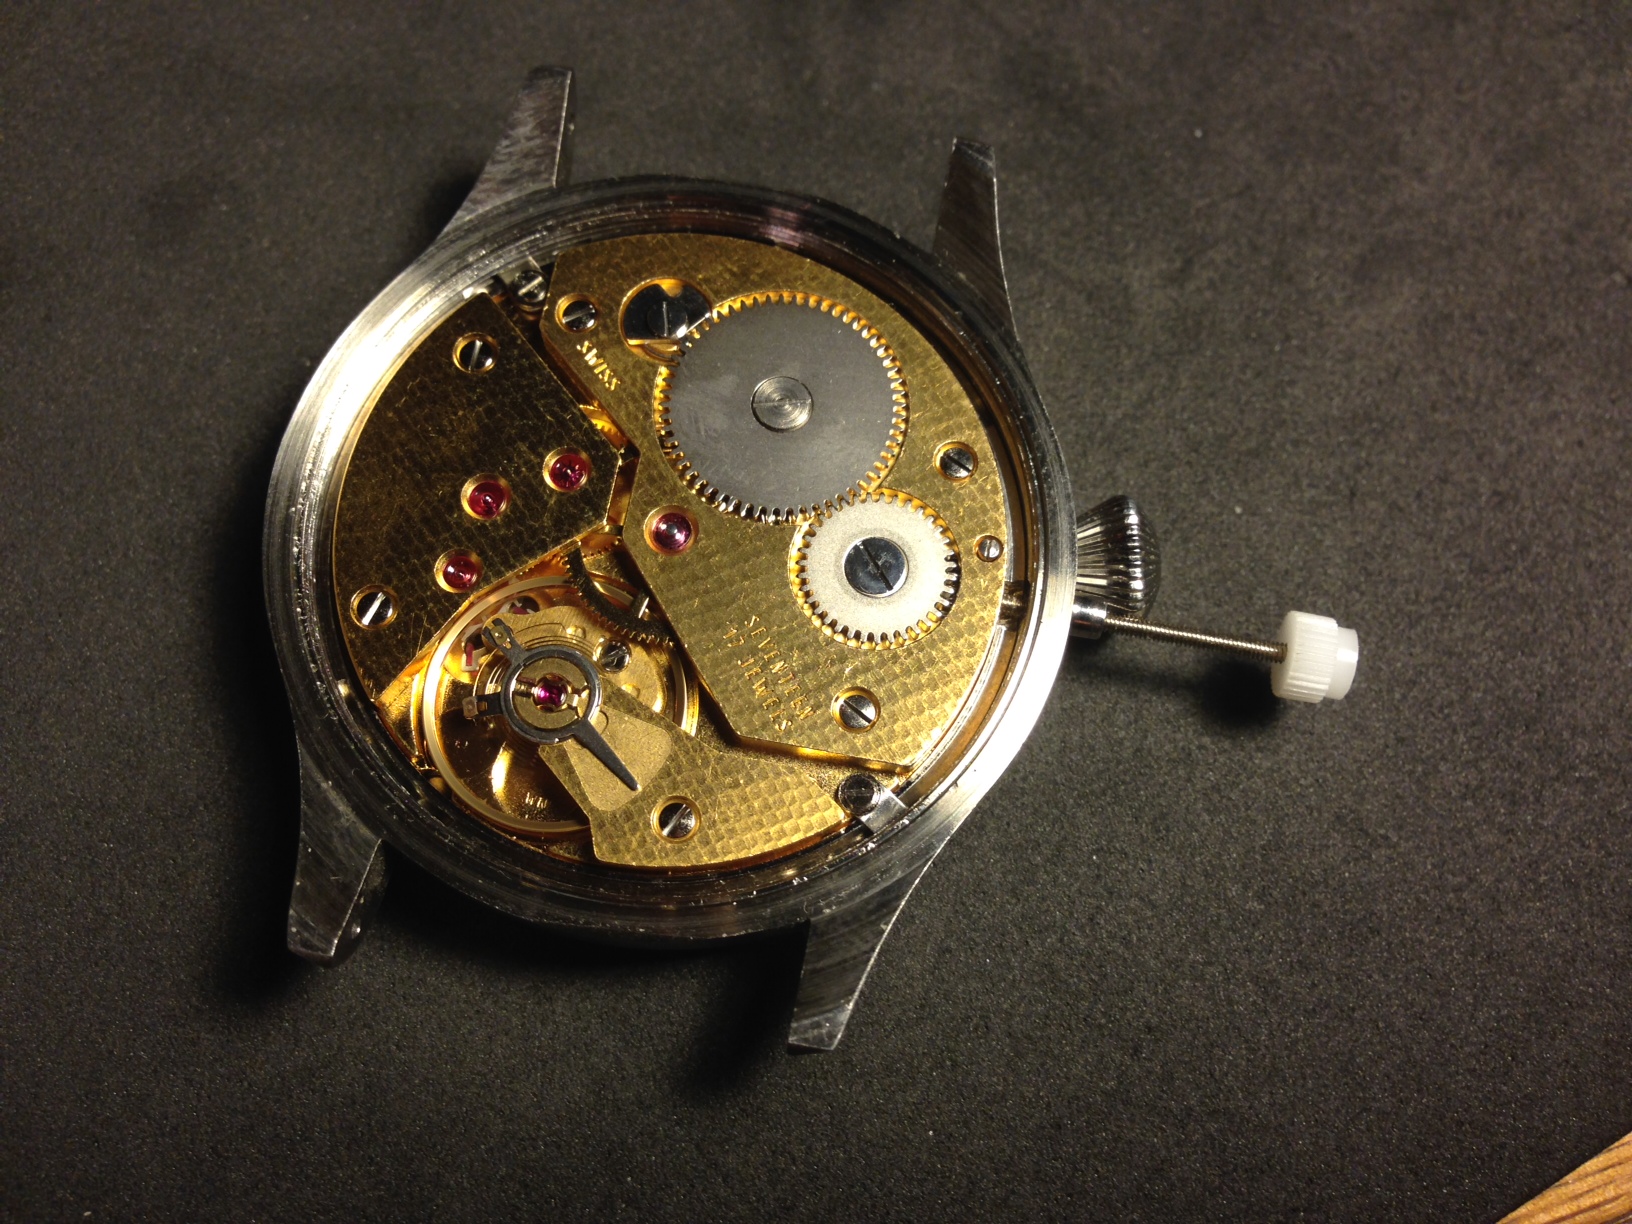
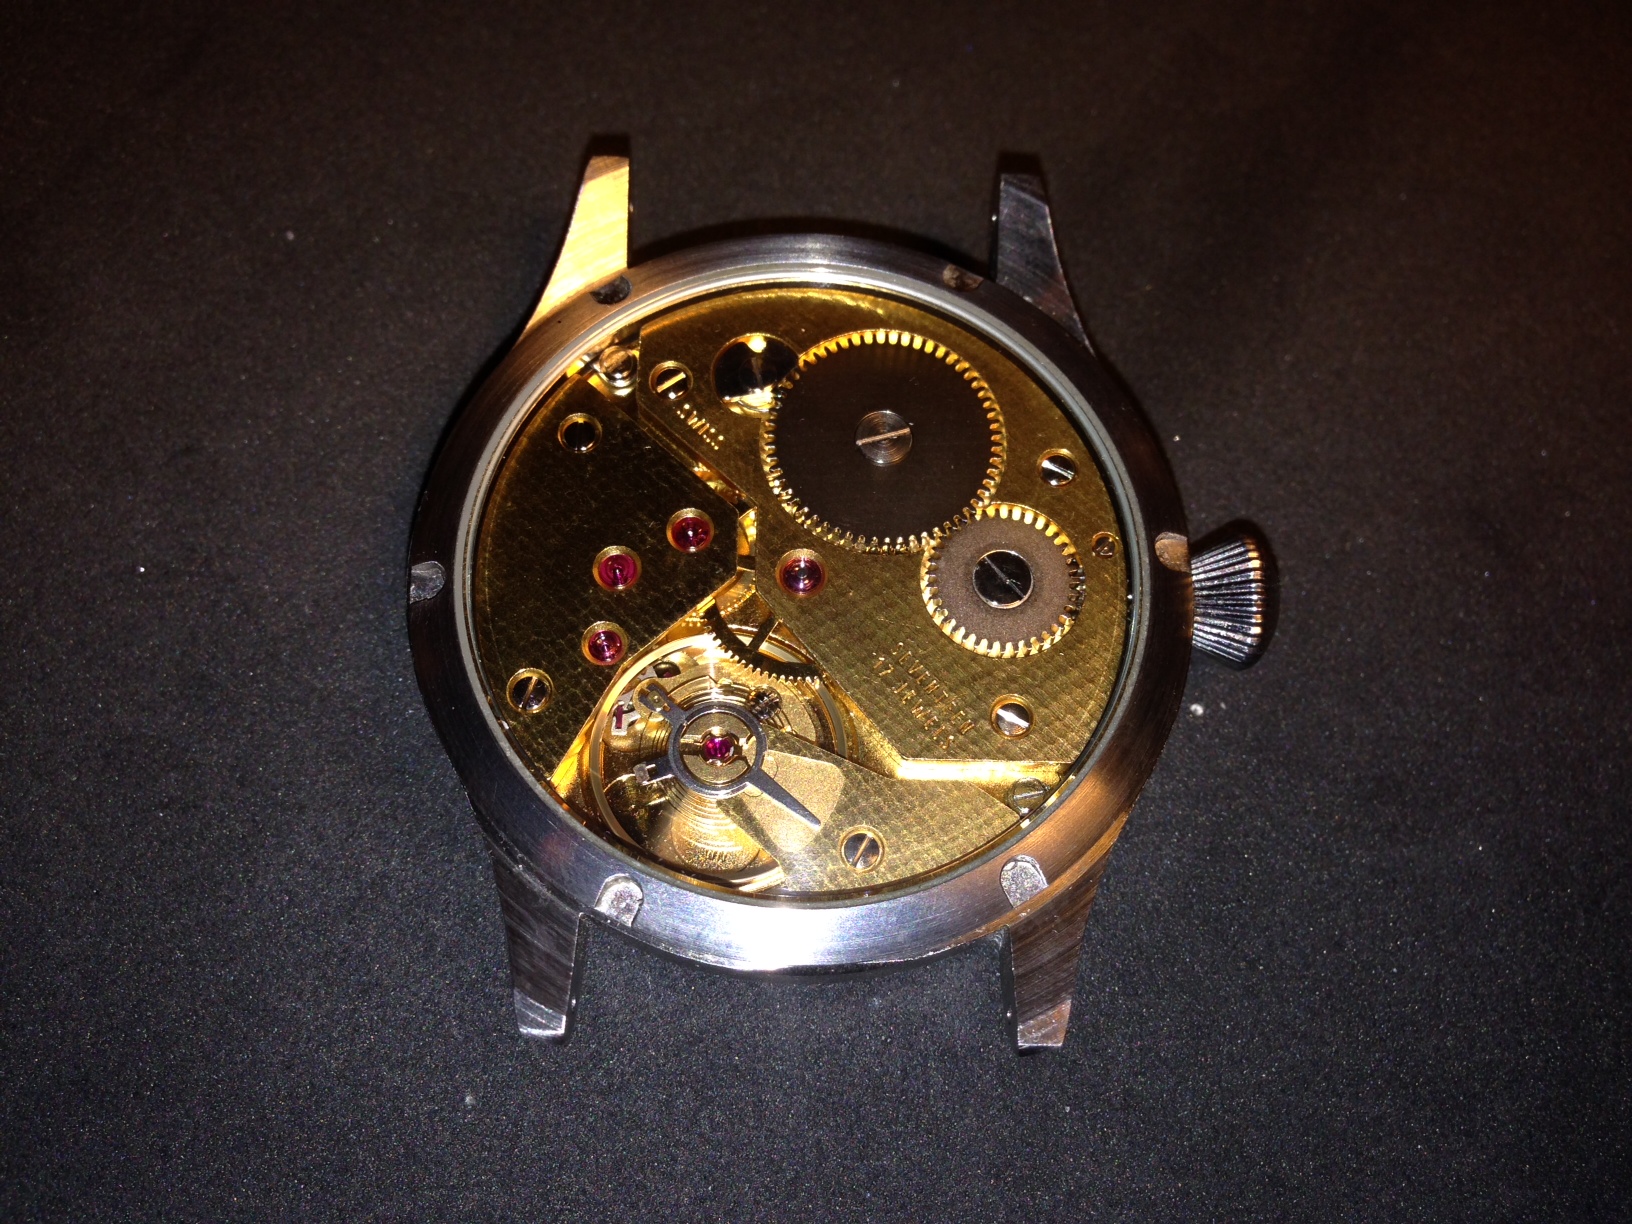
Once all of my parts were in, I laid everything out to inspect for damages or imperfections. I should probably mention at this point that I built this watch about a year ago and have been wearing it quite frequently since. I took it apart for the purpose of this tutorial, so any scratches or scuffs you may notice on the case or strap are the result of lots of use. Your parts should be in pristine condition when you receive them.
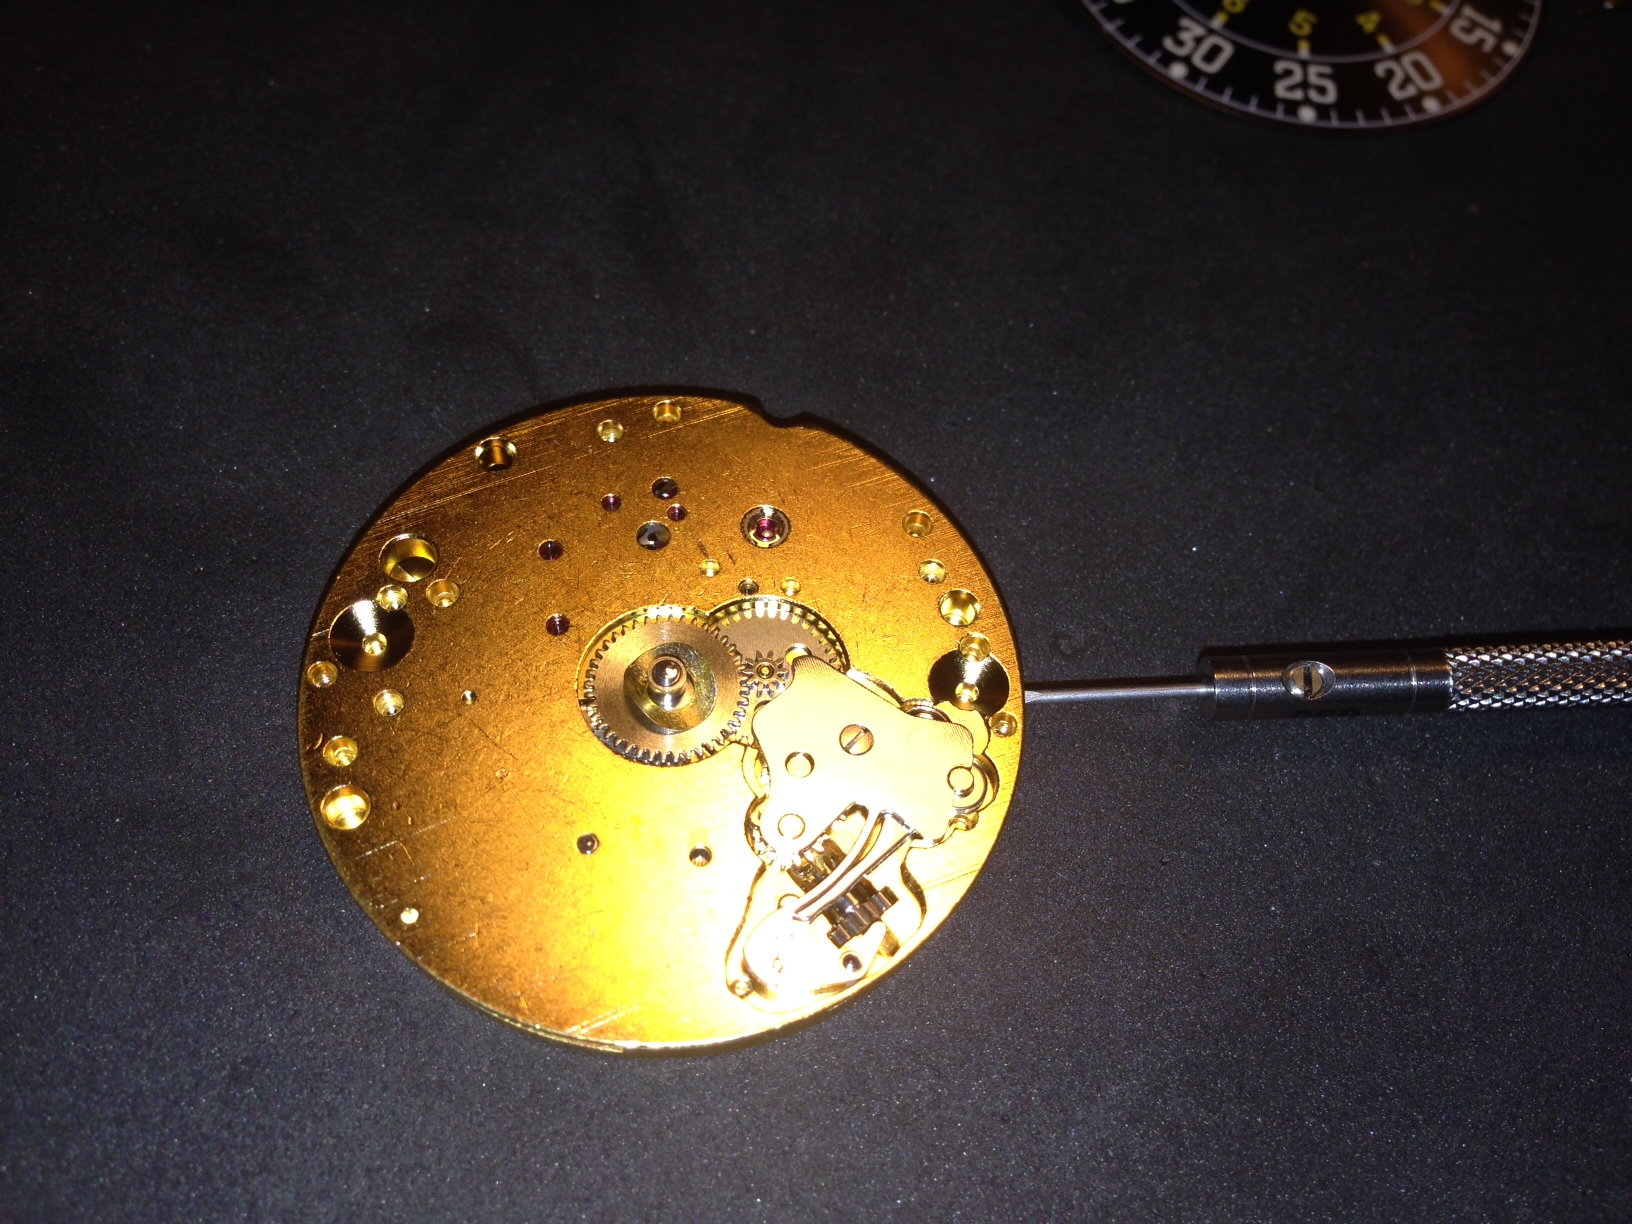
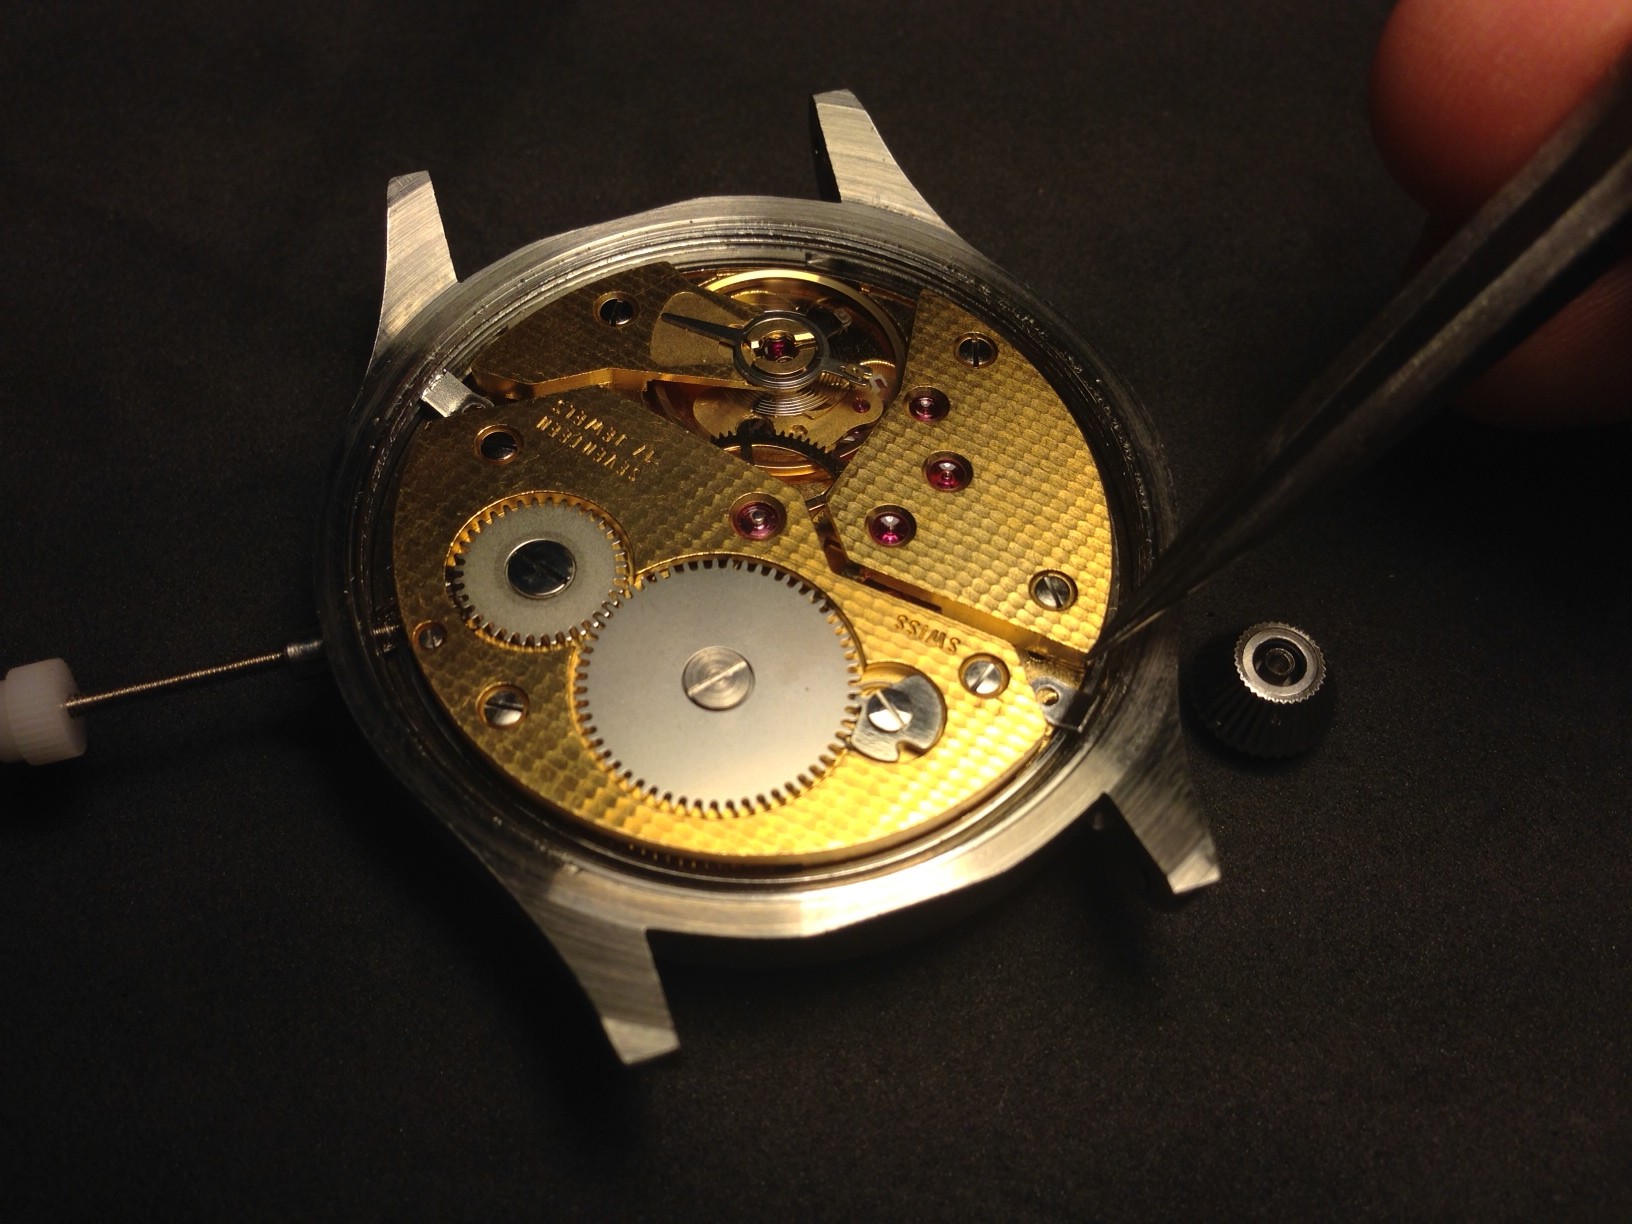
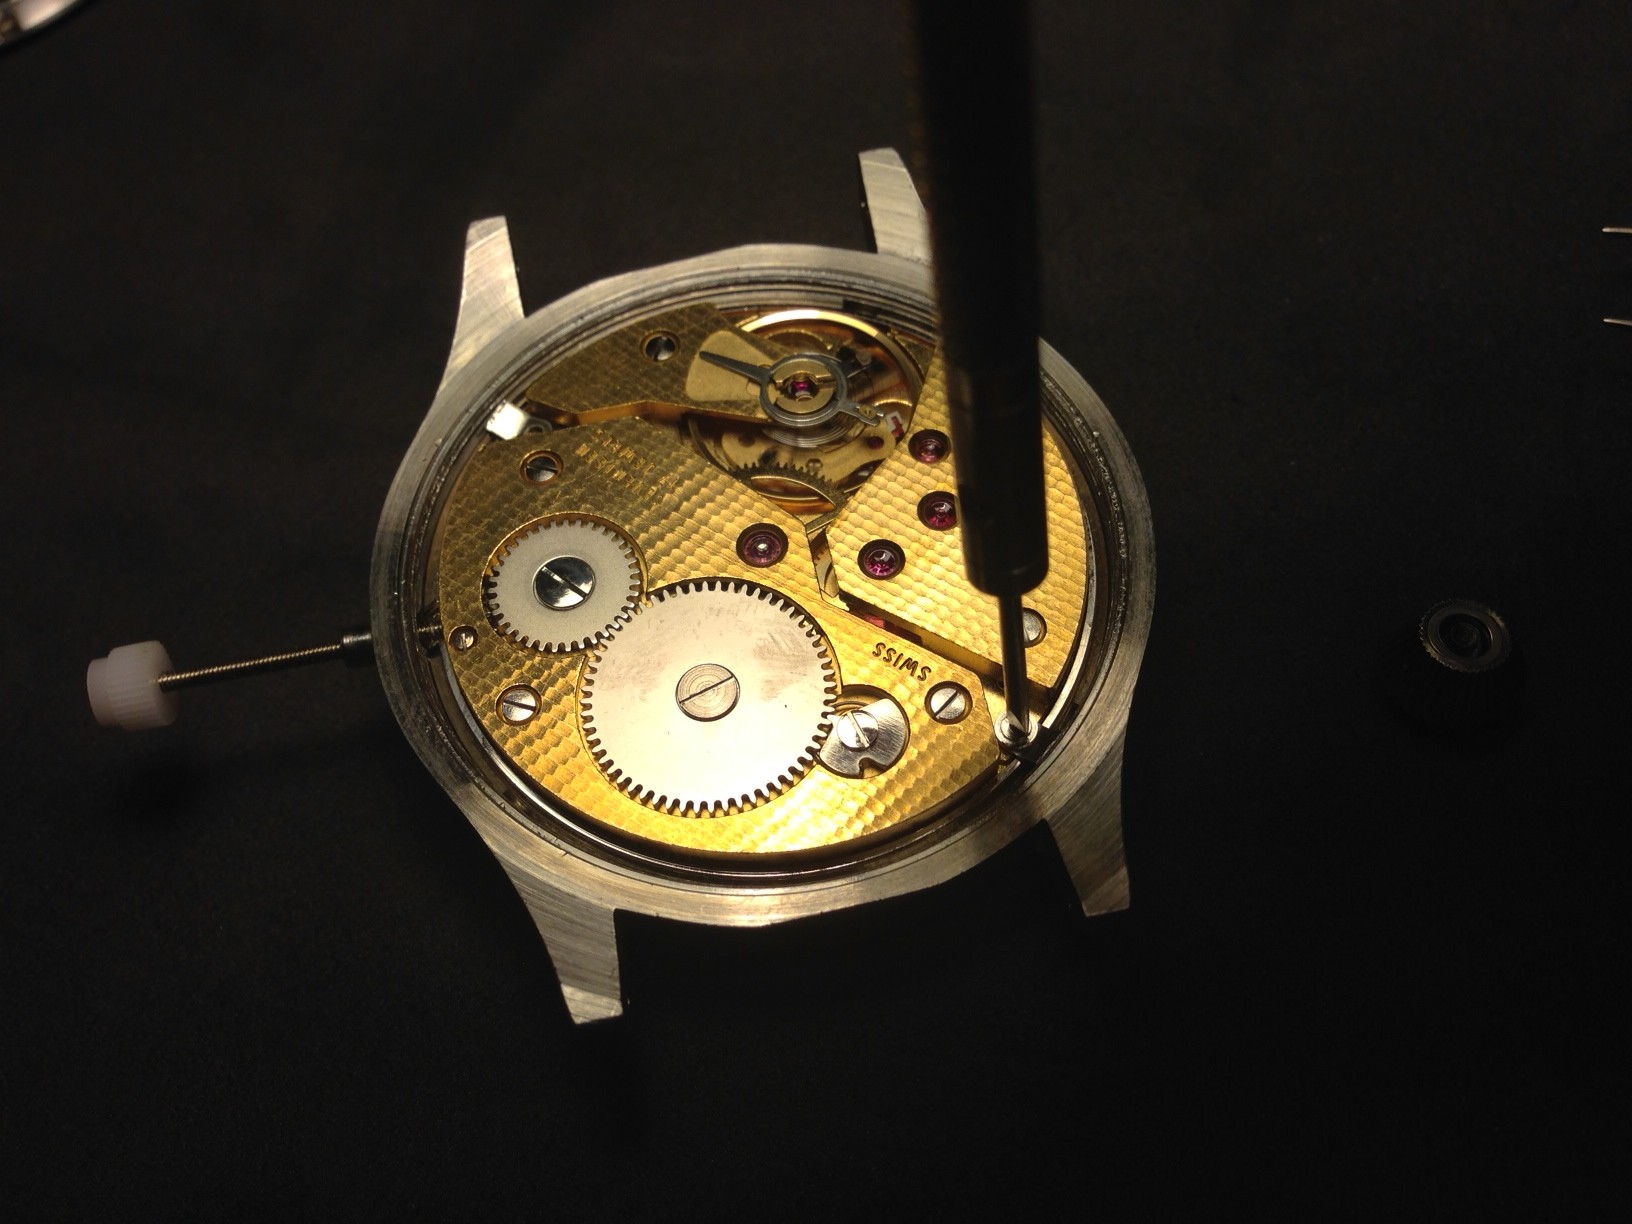
Step 2: Removing the stem from the movement
First, remove the stem from the movement. ETA uses a set screw to hold the stem in, so to remove it, you’ll need to rotate the set screw approximately 180 degrees. Don’t completely unscrew it, just turn it slightly and pull on the stem. If it doesn’t pop out, turn the screw another quarter turn and try again. 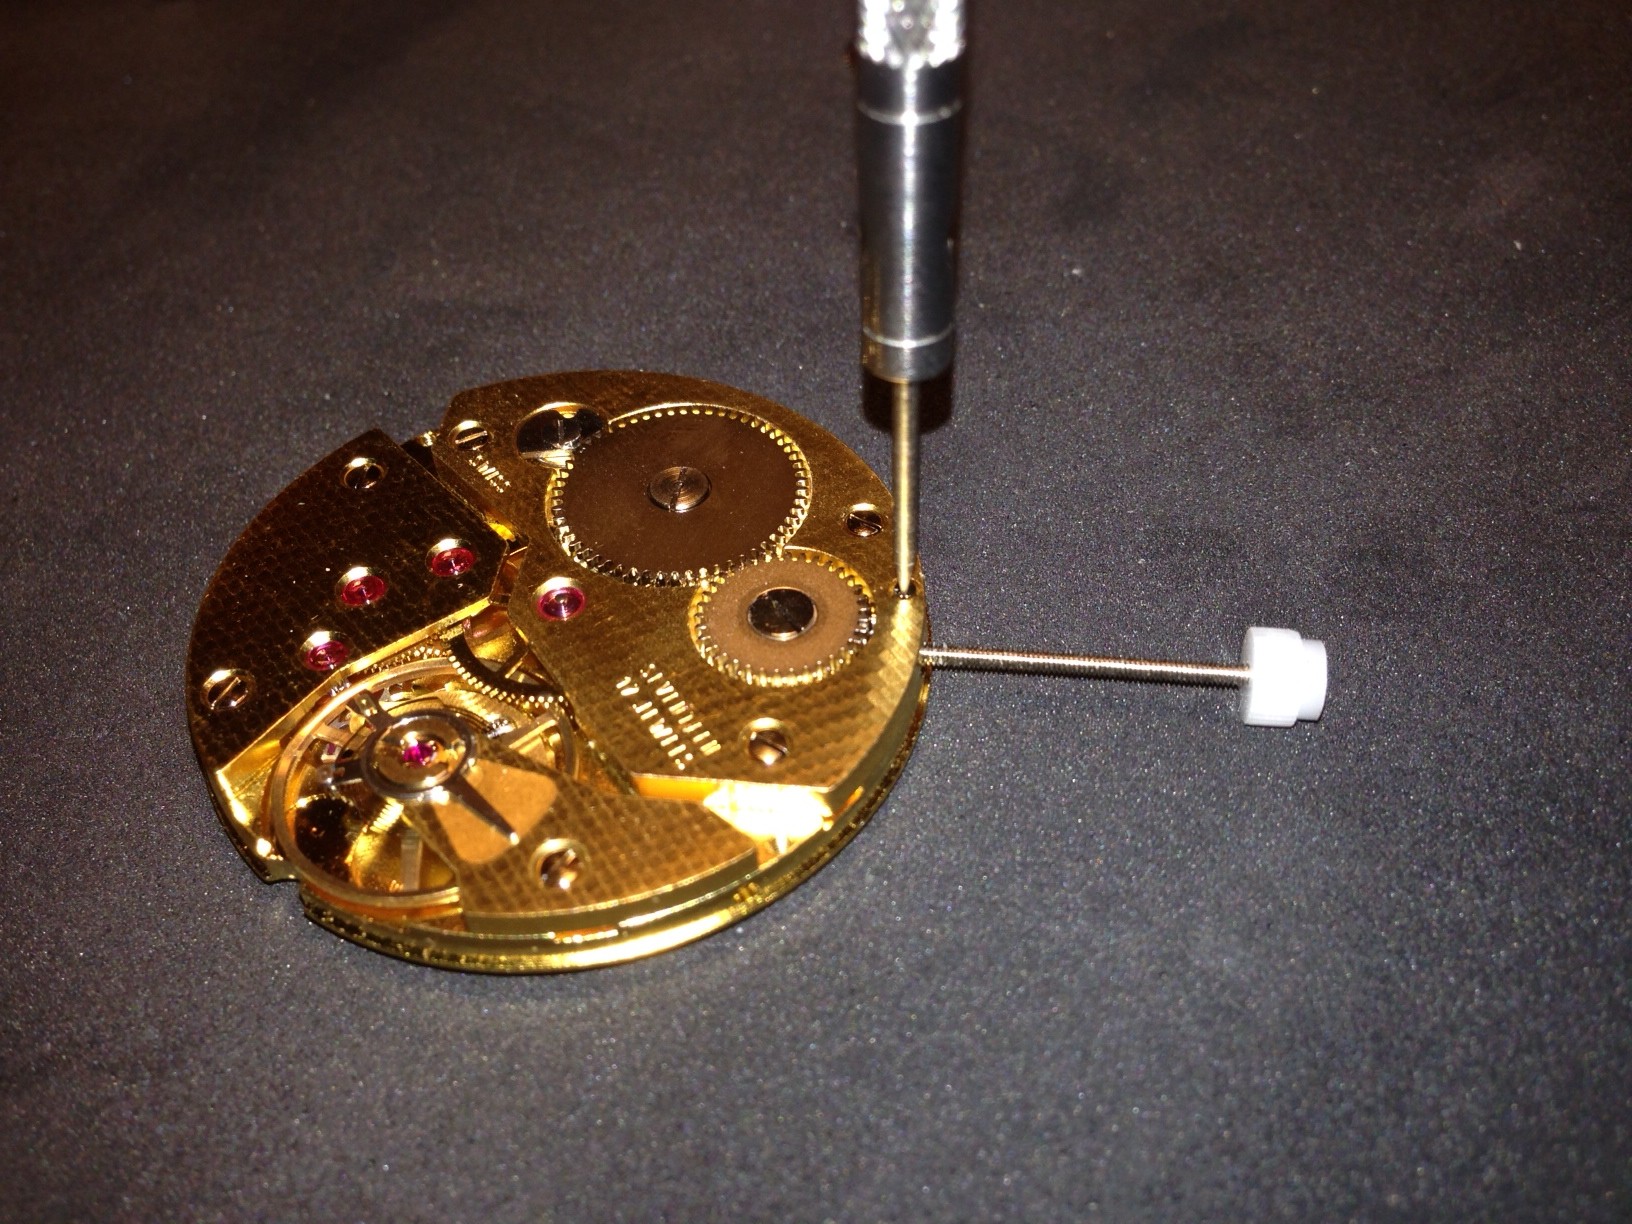
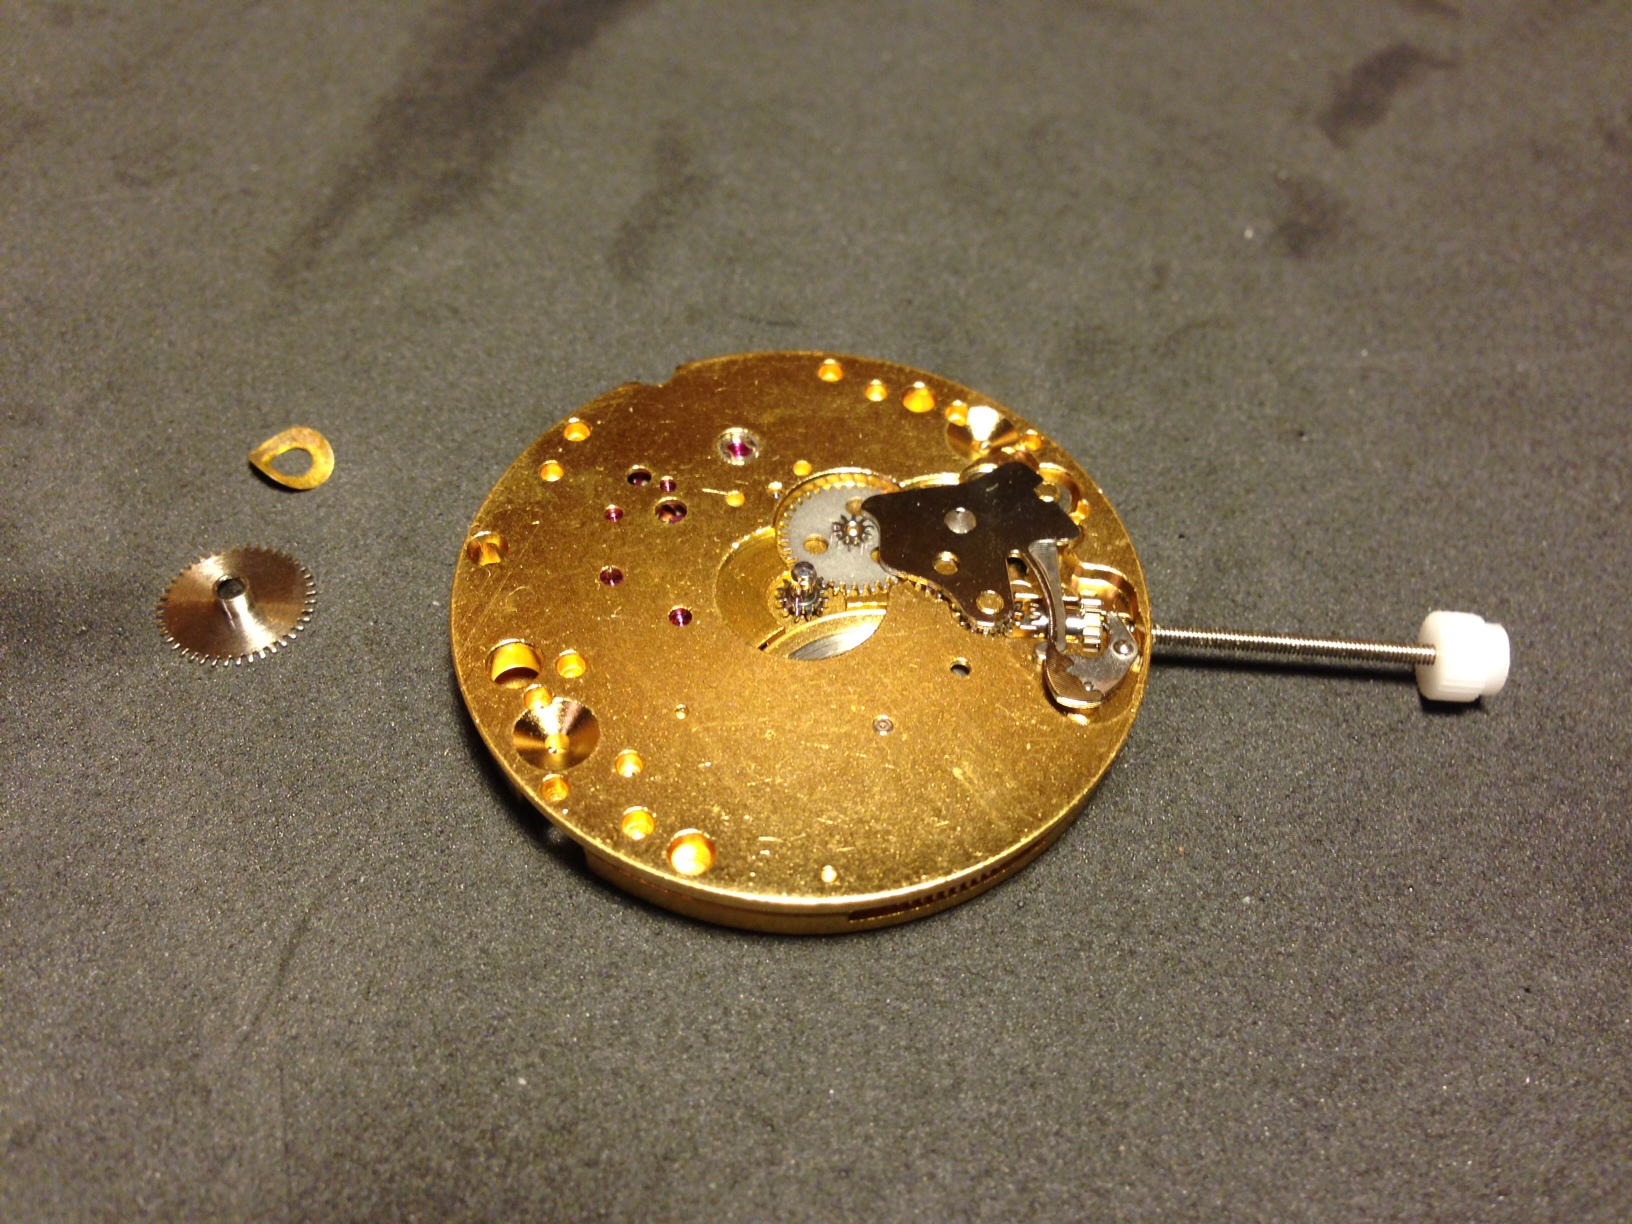
Step 3: Installing the hour wheel and dial washer
Once the stem is out, you can put the hour wheel and dial washer in place. Simply drop the hour wheel over the canon pinion and make sure the gears on the outside engage with the gears of the minute wheel.
Once the hour wheel is in place, put the dial washer on top of it. When the dial is installed, it will press against the washer and keep the hour wheel in place.
Step 4: Installing the dial
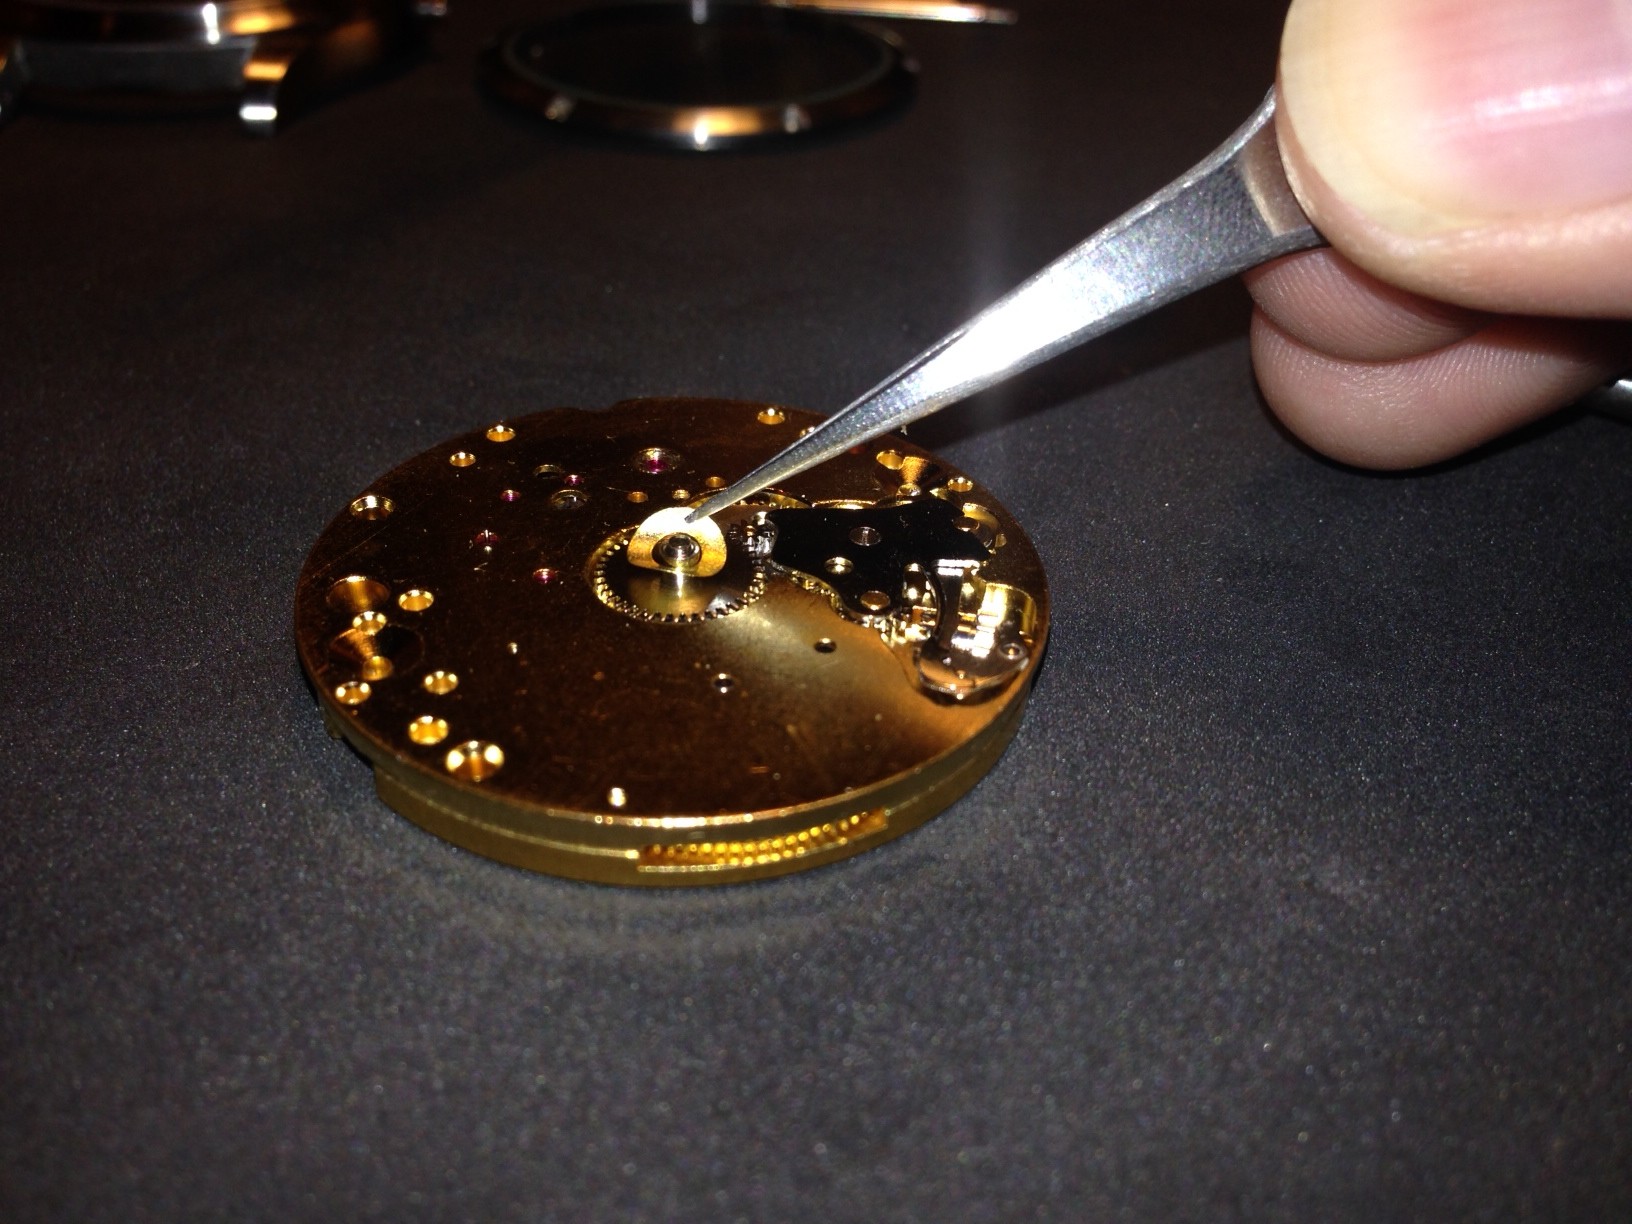
Next, loosen the set screws that hold the dial feet in place. These will be tightened down when you receive the movement, so give them a few counter-clockwise turns to clear the space that the dial feet will sit in.
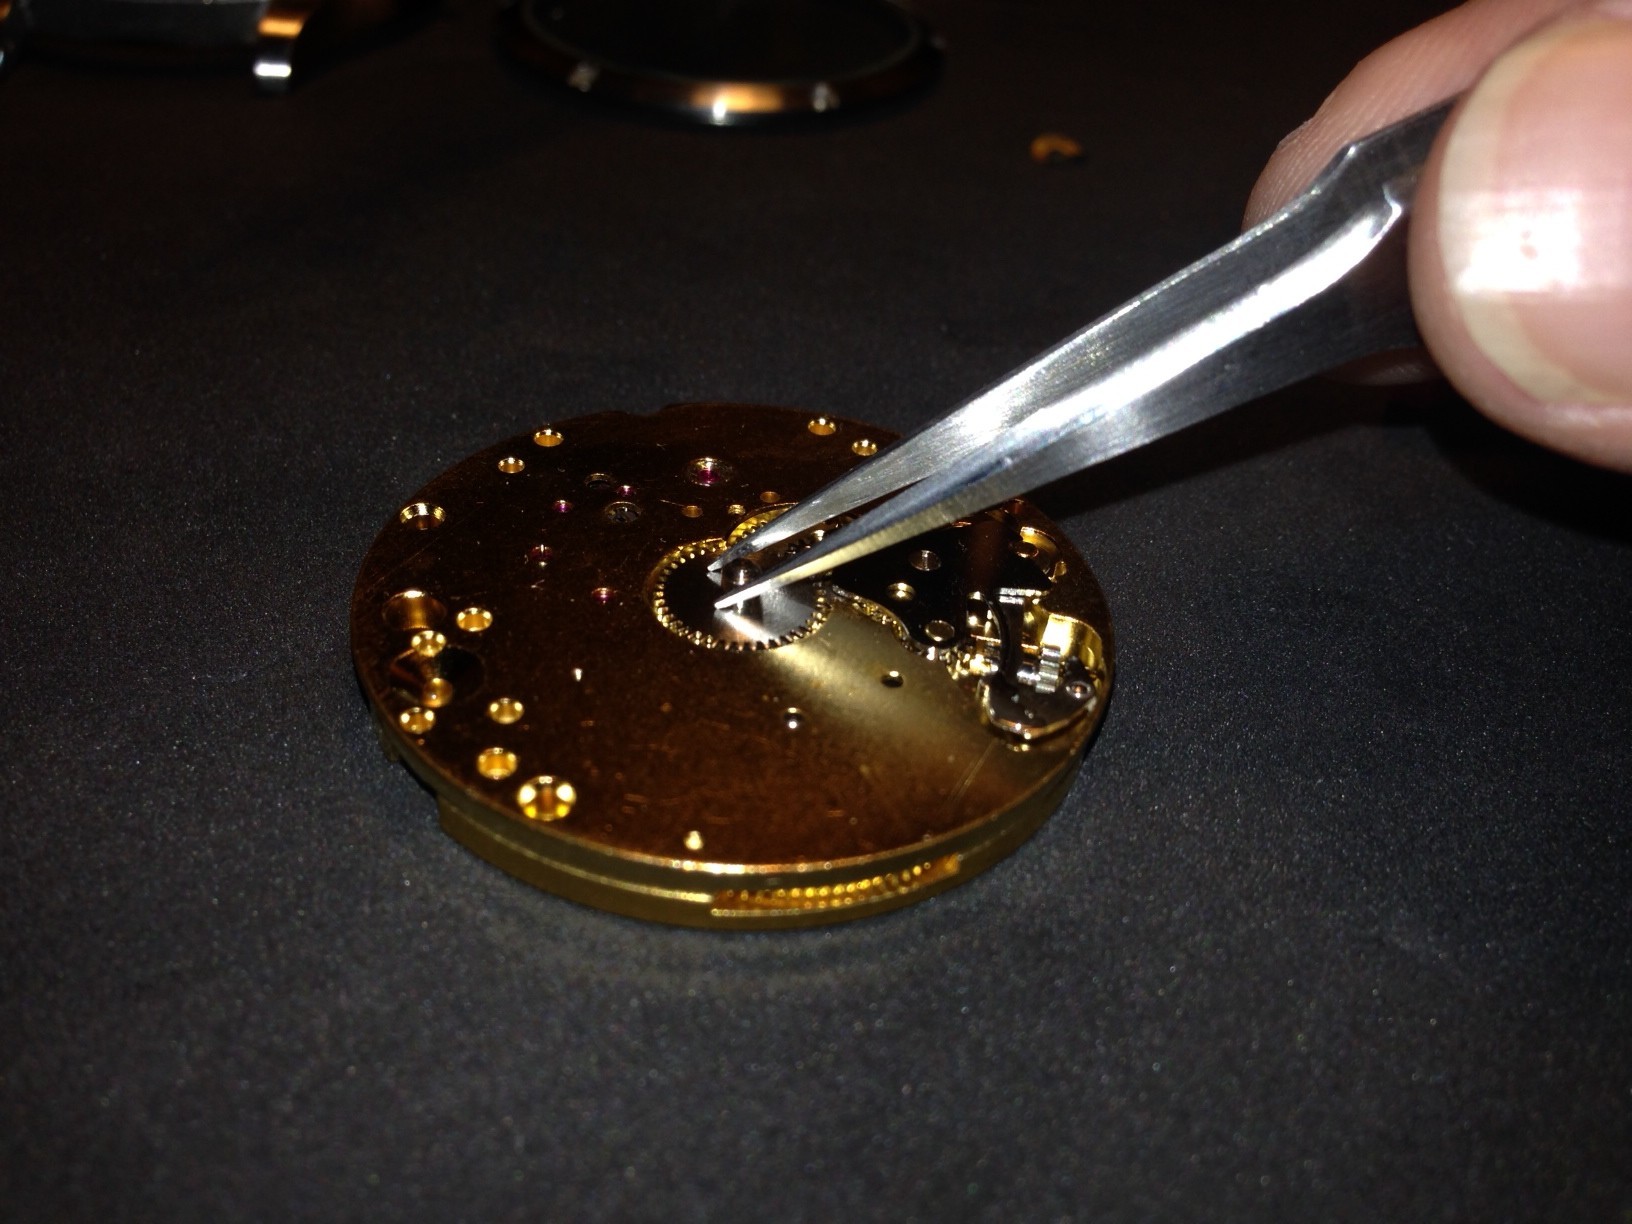
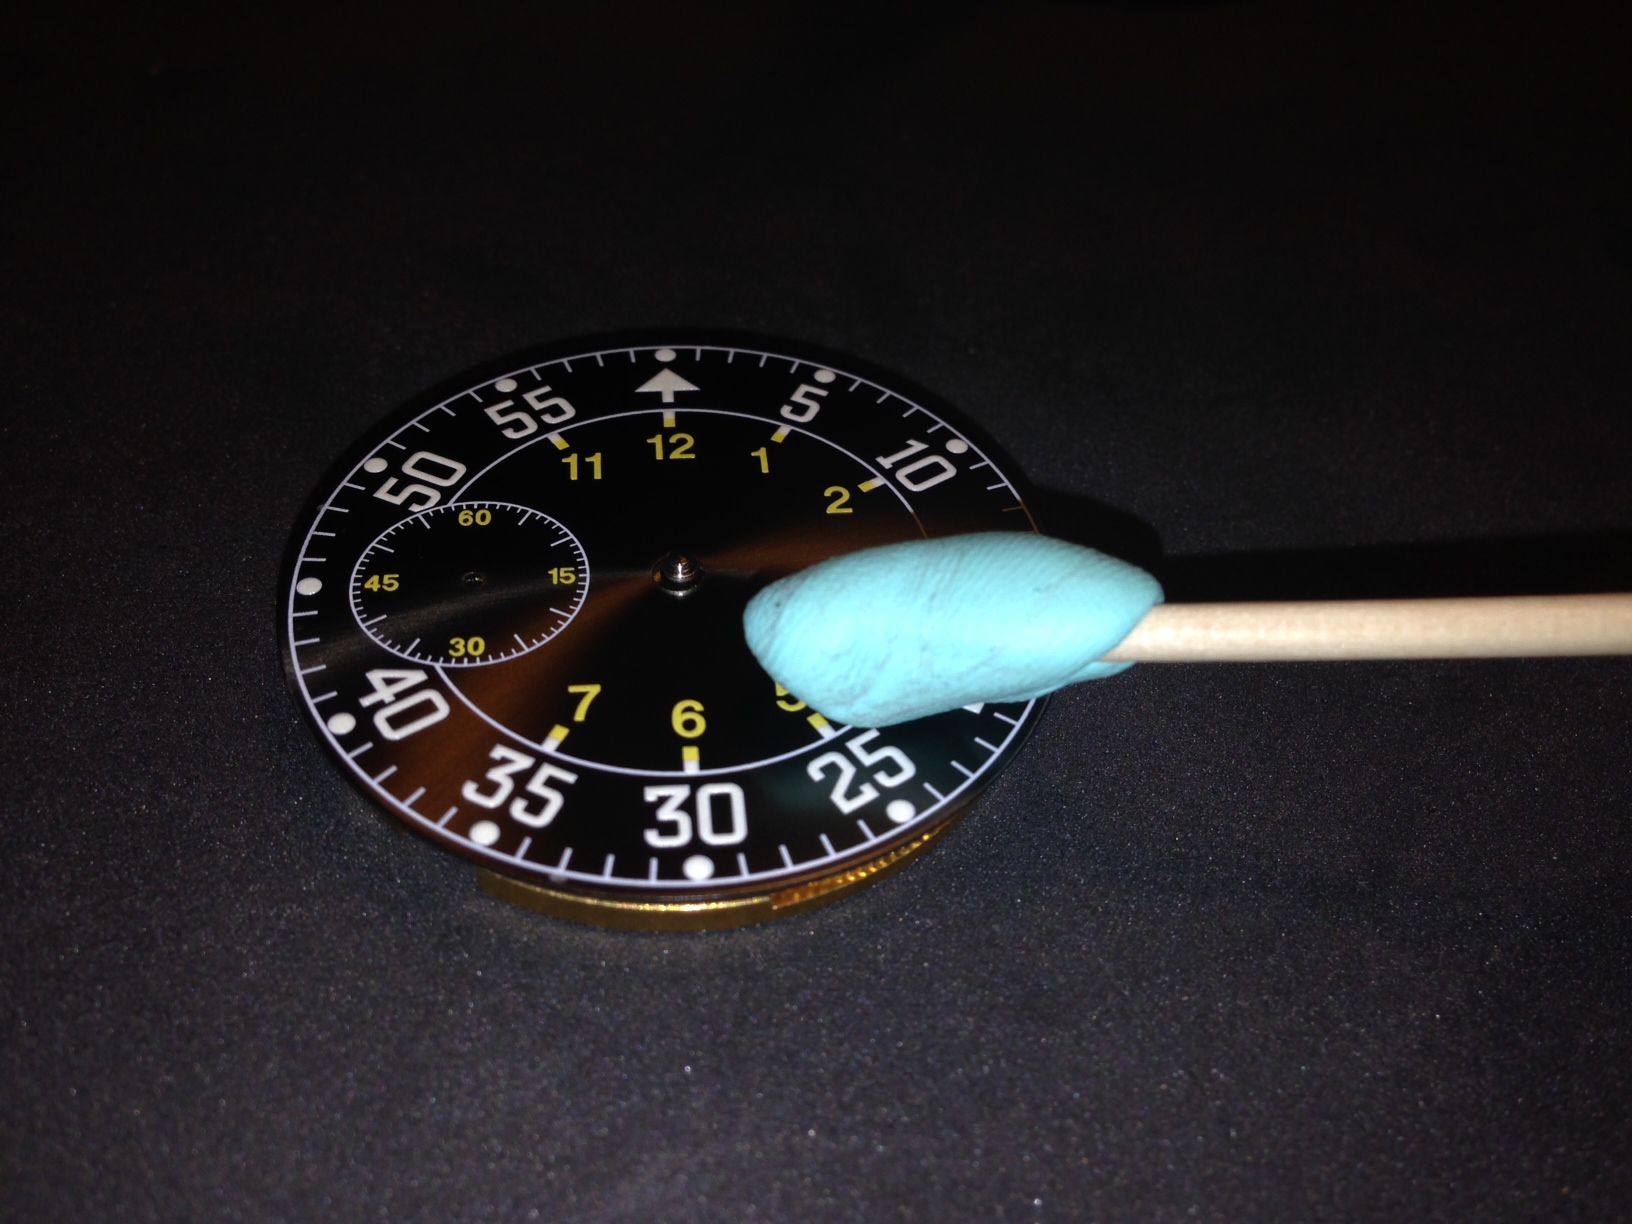
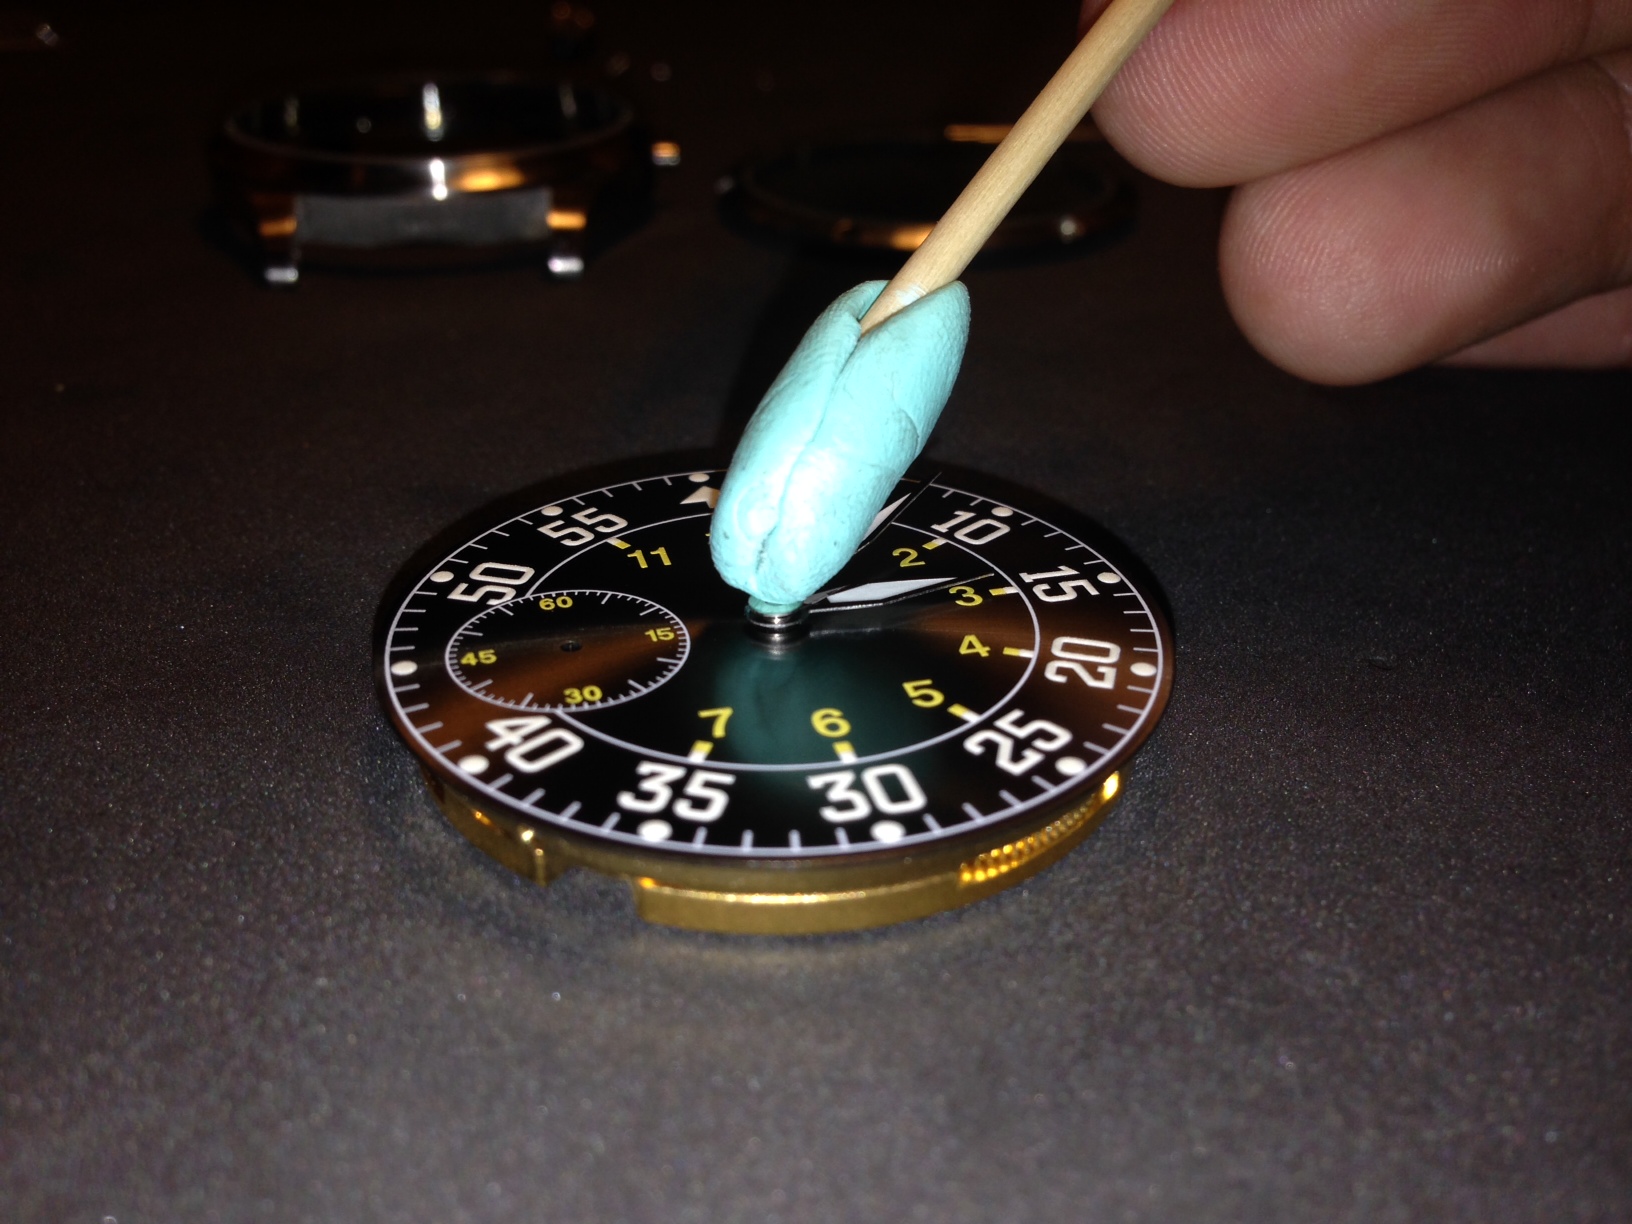
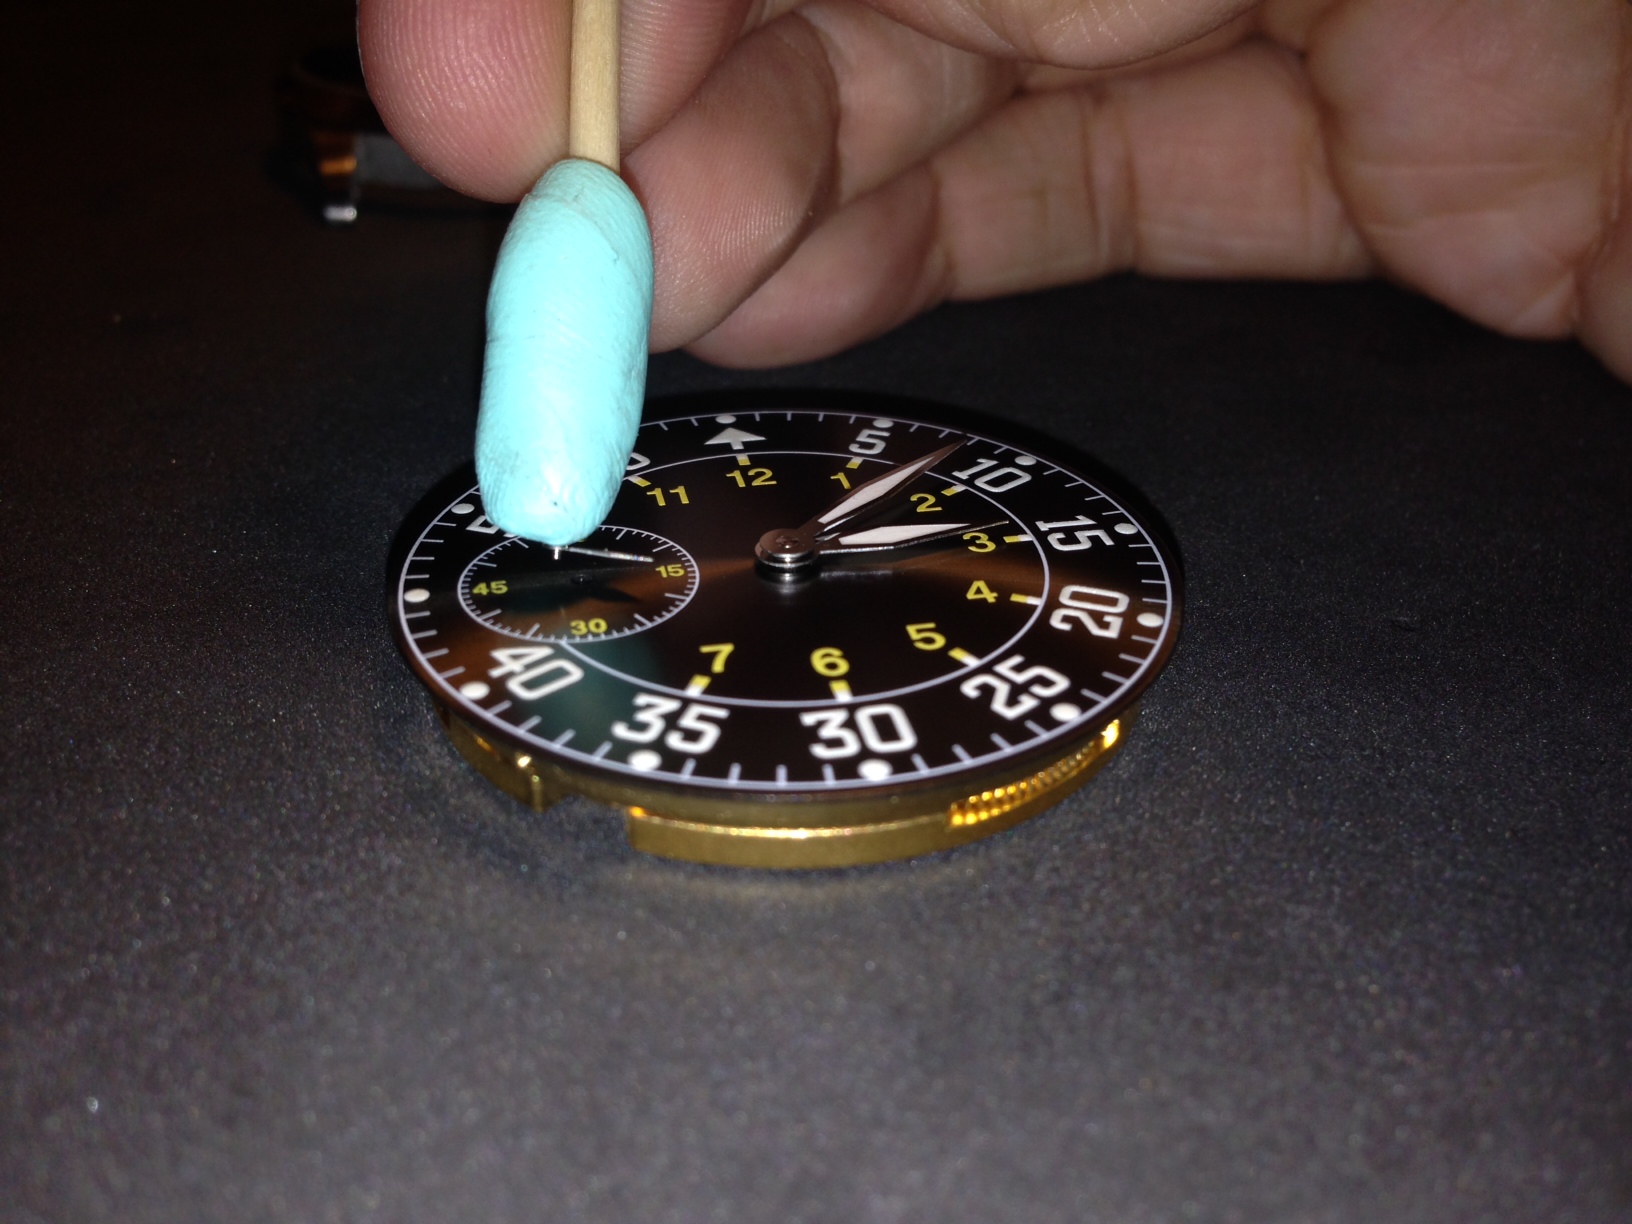
Now we’re ready to put the dial in place. Avoid scratching the dial or getting fingerprints on it. I used a stick with some Rodico cleaning putty on the end to put it in place. If you like, you can just grip it from the sides. Once the dial is in position and sitting flush with the movement, tighten the set screws you just loosened. This should hold the dial firmly in place.
Step 5: Attaching the hands
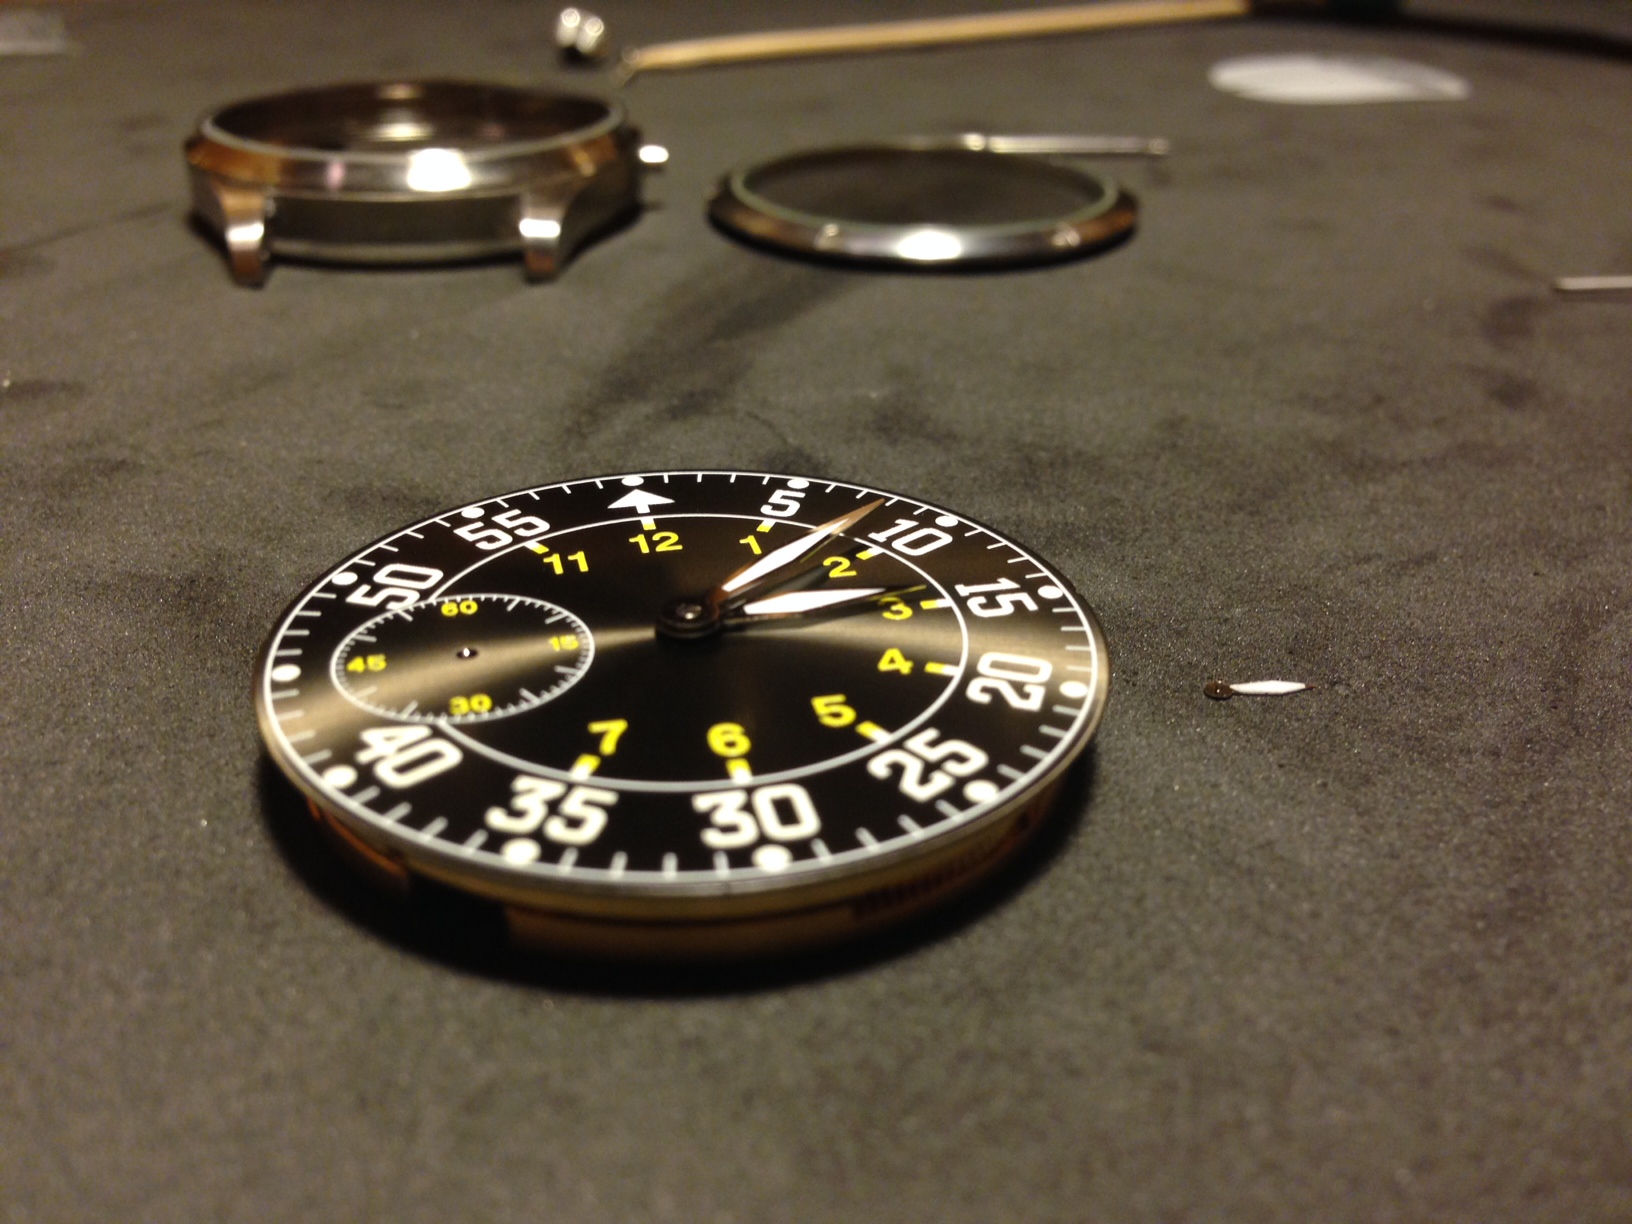
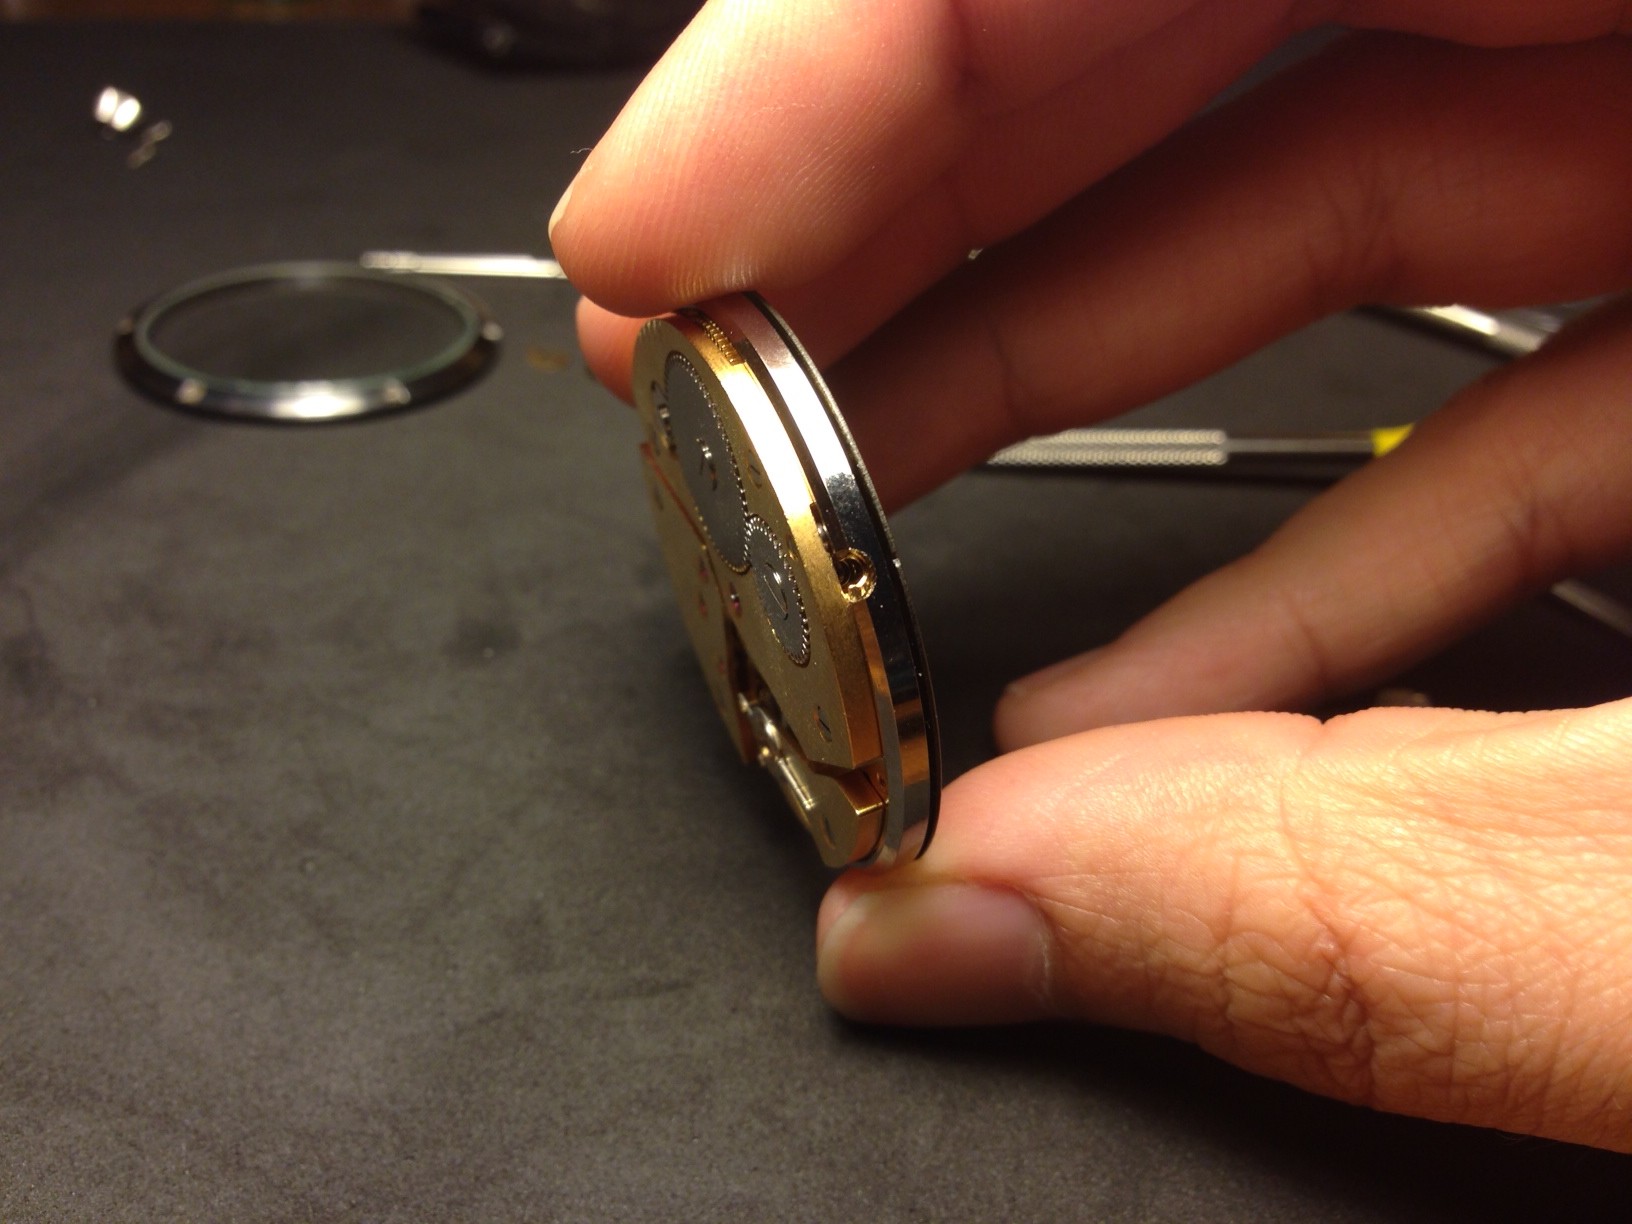
Now it’s time to set the hands. Starting with the hour hand, drop it into place and use something to press it over the shaft of the hour wheel. Once in place, check it from the sides to make sure it is parallel with the surface of the dial.
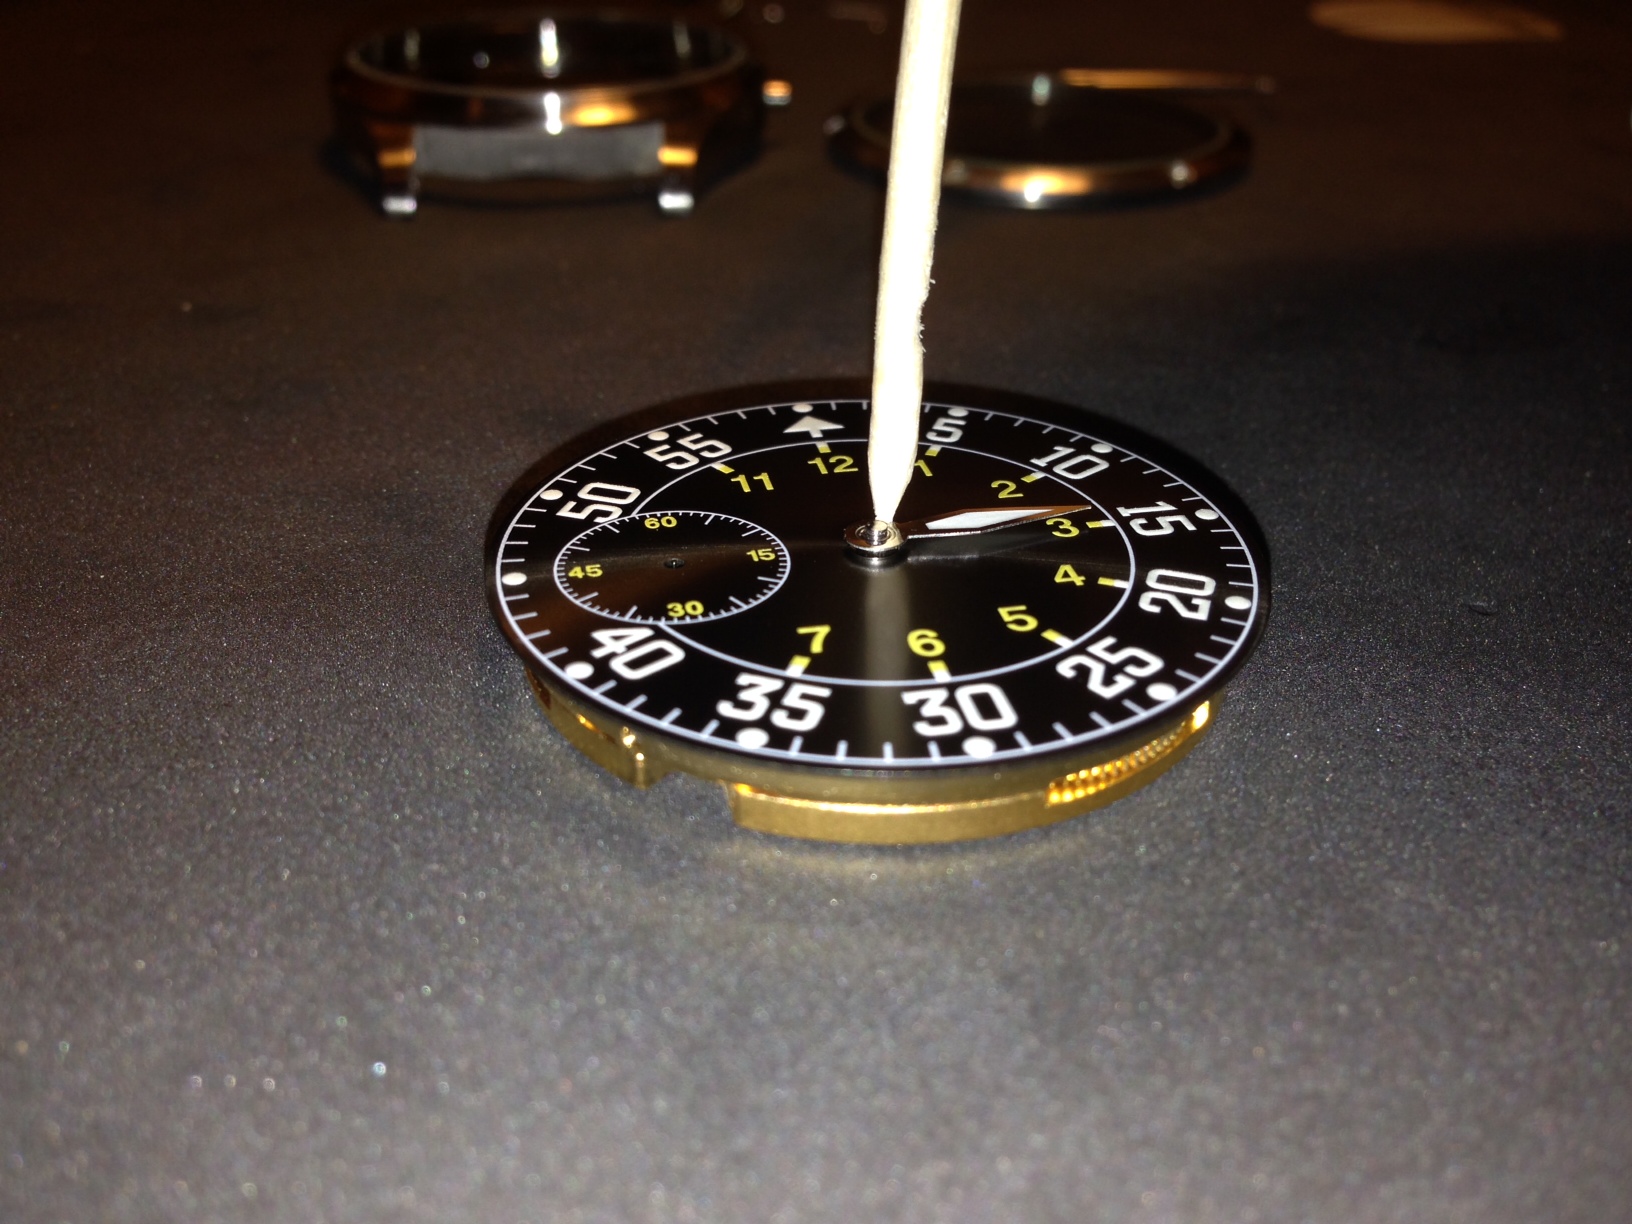
Next is the minute hand. I used Rodico cleaning putty on a stick to put the minute hand in place before pressing it down onto the canon pinon. Again, verify that the hands are parallel with the dial and each other.
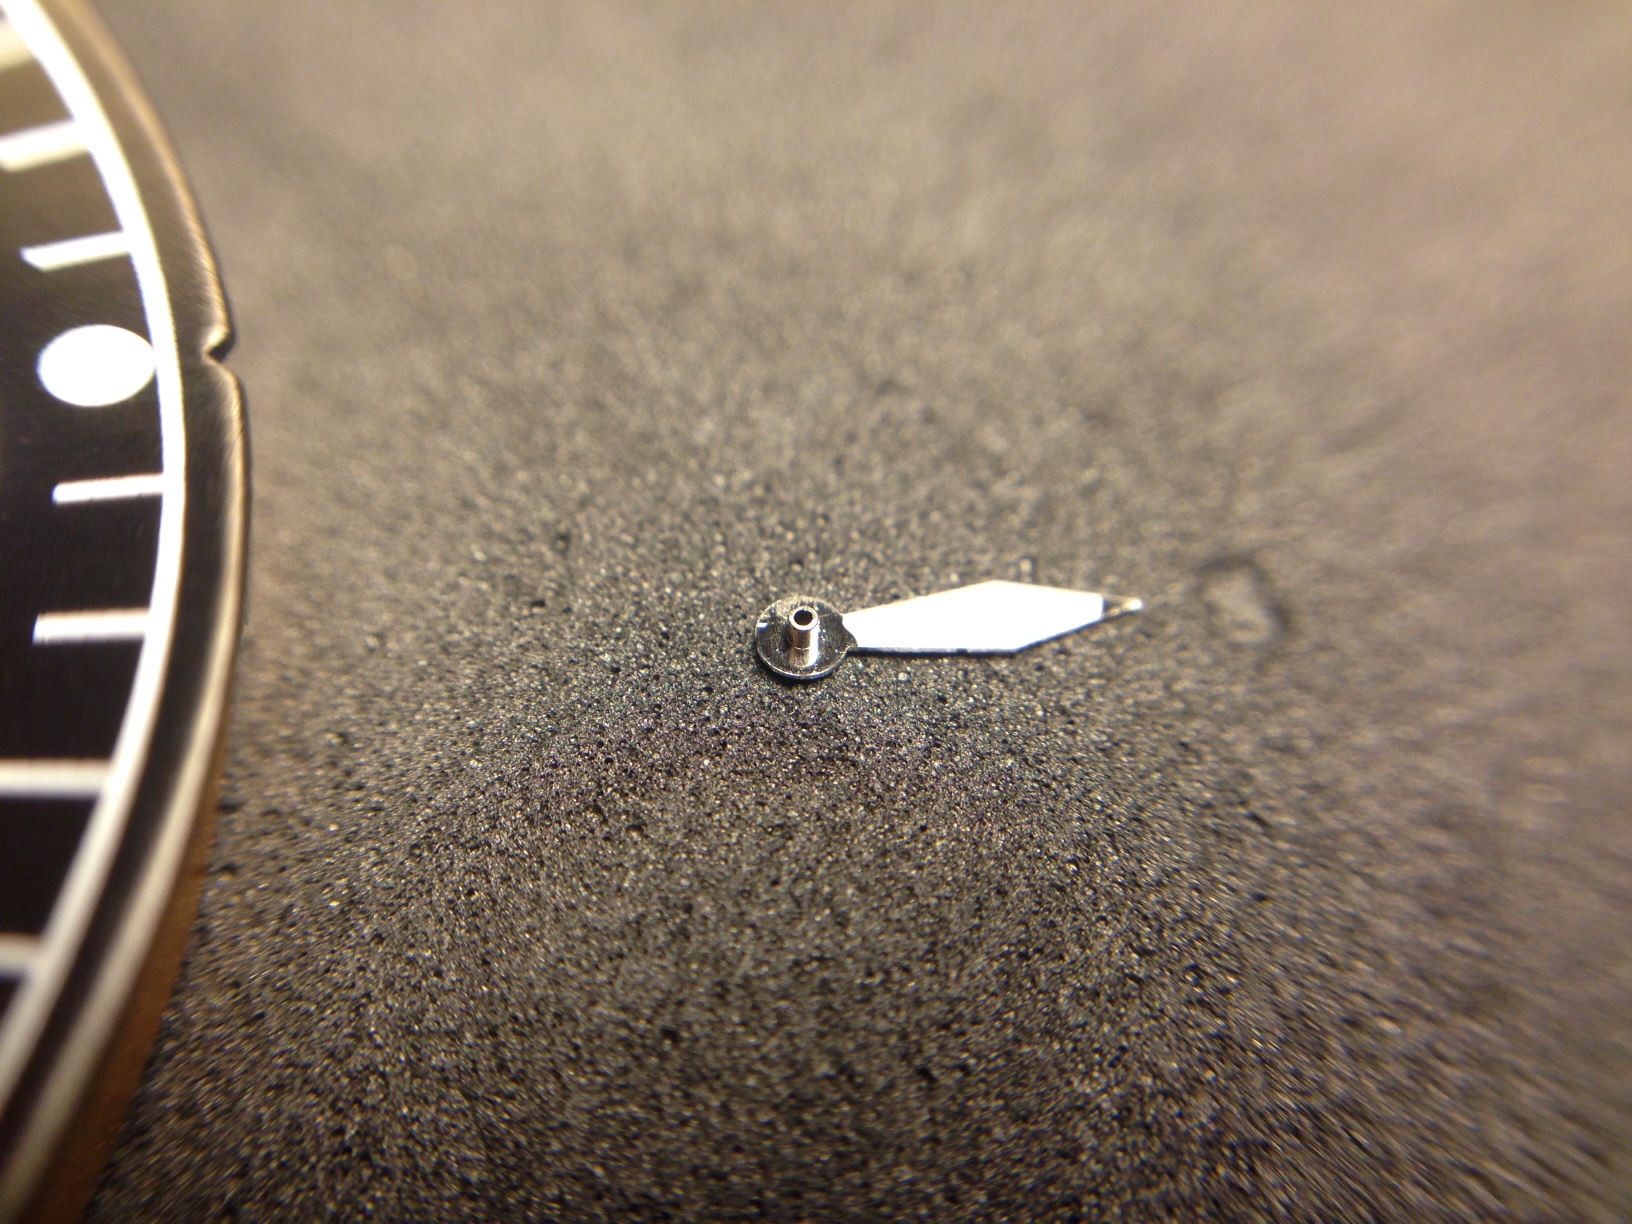
The last and most difficult hand is the second hand. The pinion for the second hand is extremely small. So small you won’t likely be able to see it without magnification, so if you have a loupe or magnifying glass, now is the time to use it. The pinion is also fragile, so it’s best to get the second hand in position. Then, verify that it’s on the pinion and not next to it before pressing down.
Step 6: Casing the movement
Once the dial and hands are firmly in place, add the movement adapter. Slip it around the movement, making sure to align the hole in the adapter with the stem hole in the movement. The bevel should face away from the dial.
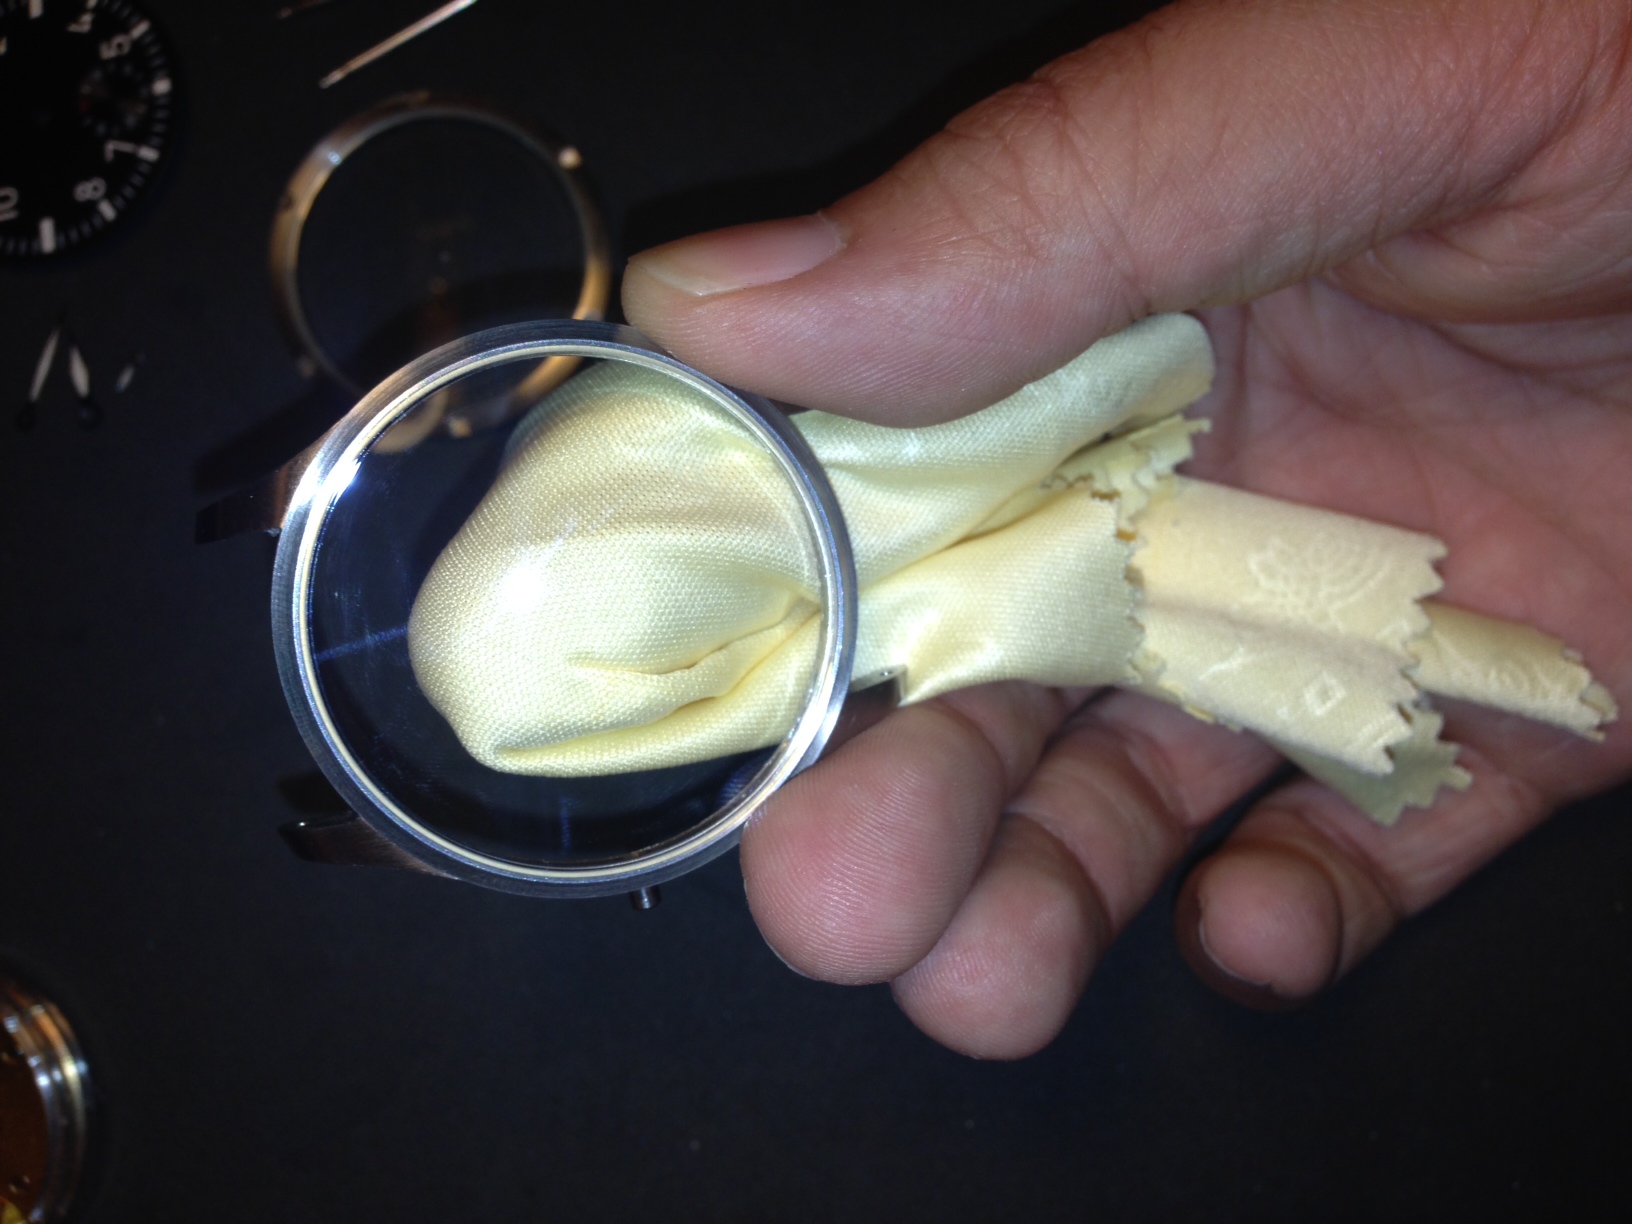
We’re almost ready to put the watch in the case, so set the movement aside (dial side up) and start to clean the inside of the case with a microfiber cloth. Make sure there are no fingerprints or dust specks inside the case. Once it’s sealed up, you want it to stay that way, so take your time to make sure everything is clean.
Once the case is clean, drop the movement in. Once again, make sure the watch stem is lined up and in the appropriate place.
Once the movement is in place, I like to put the stem in to keep it from shifting around while I screw the movement holder tabs in place. Please note that the tab is upside down in this photo. You want it to slope downward and follow the contour of the adapter ring before you screw it in place.
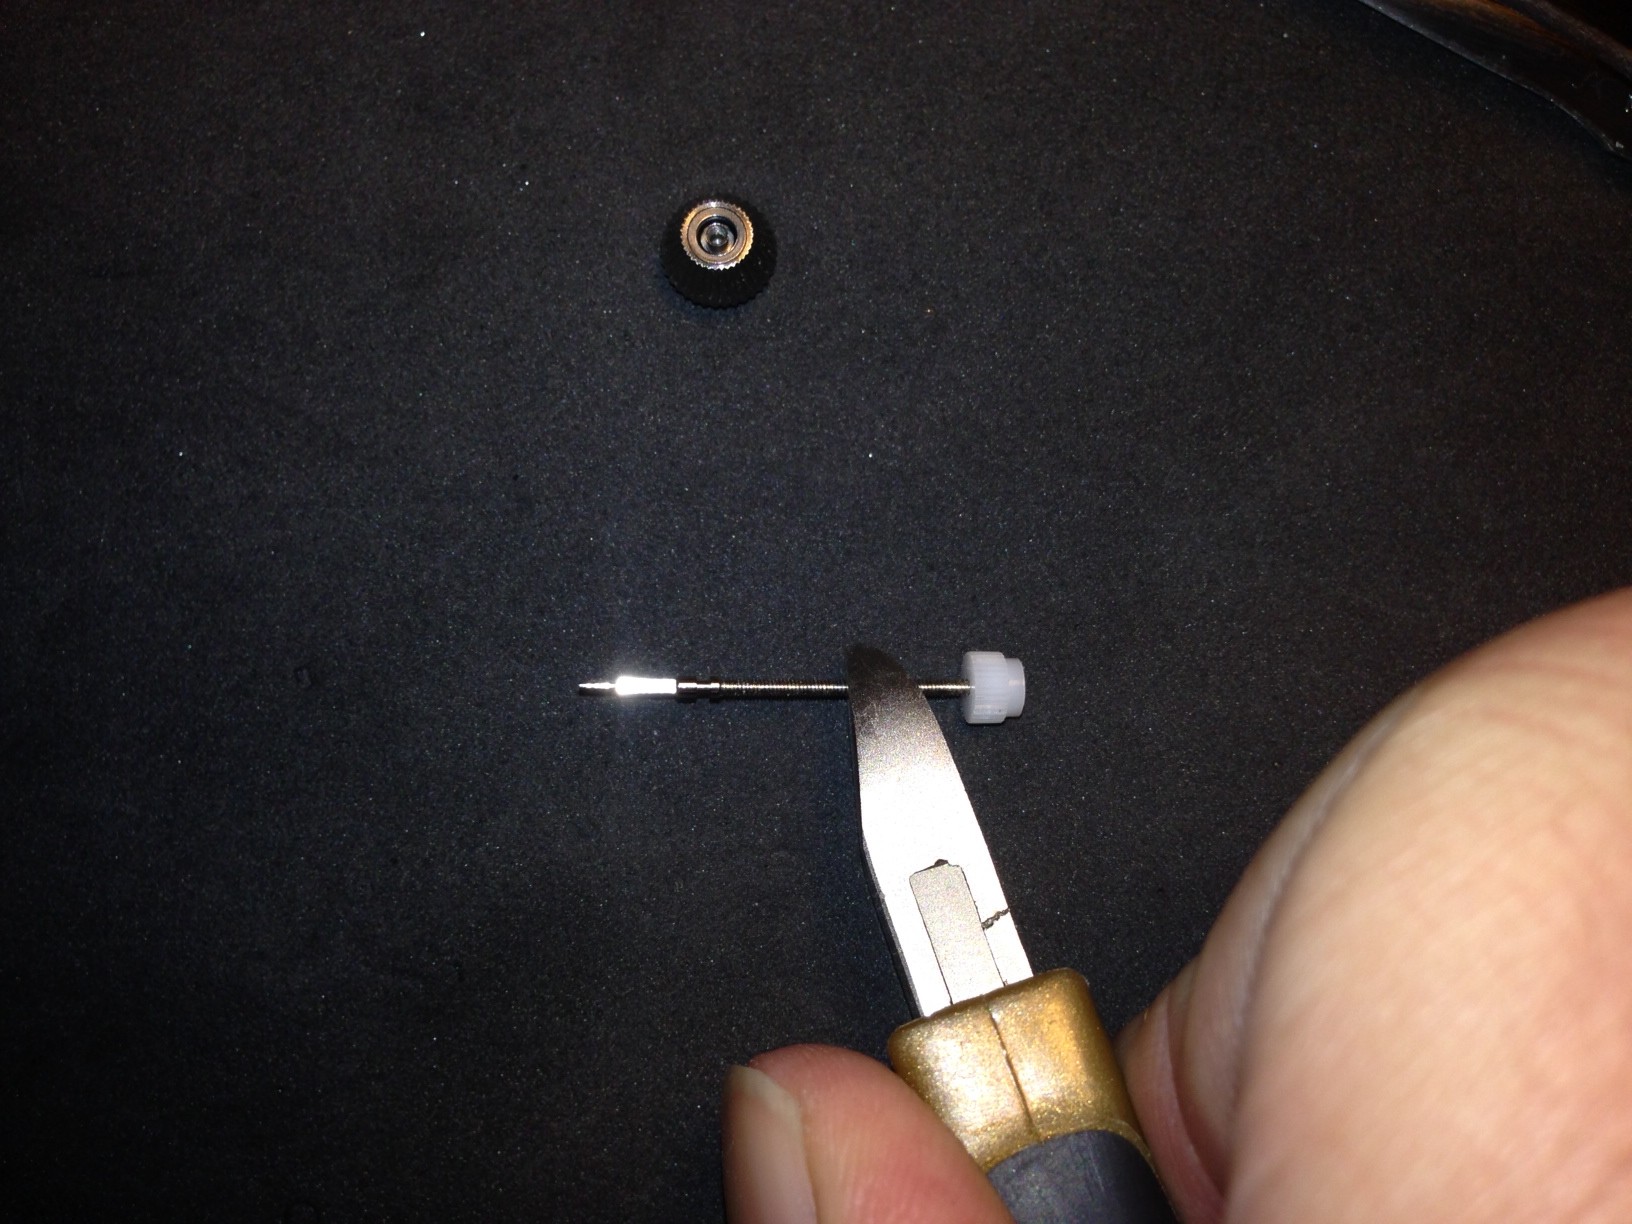
Step 7: Cutting the stem
Once the movement tabs are in place, it’s time to measure the stem and cut it down to fit your crown. I usually just eyeball this part. If you put the crown next to the stem, you can get an idea of how much length you’ll need to cut off. If you like, you can mark the stem with a black marker so you know where to cut.
Once the extra length of the stem is cut off, screw the crown on. If the cut wasn’t clean, you may have to file the end of the stem before the crown screws on. I like to add a little bit of Loctite glue to the stem so the crown doesn’t come off in the future.
Once the crown is screwed in place and you are happy with the length of the stem, secure it by tightening the locking screw. Once the screw is tightened, check to make sure you can pull the crown and set the time properly.
Step 8: Attaching the case-back and straps
Next, screw on the case-back and attach the watch straps. I found that my JAXA wrench couldn’t open wide enough to fit this case-back so I had to use a friction ball case opener instead. Once the case-back is securely tightened, attach the straps.
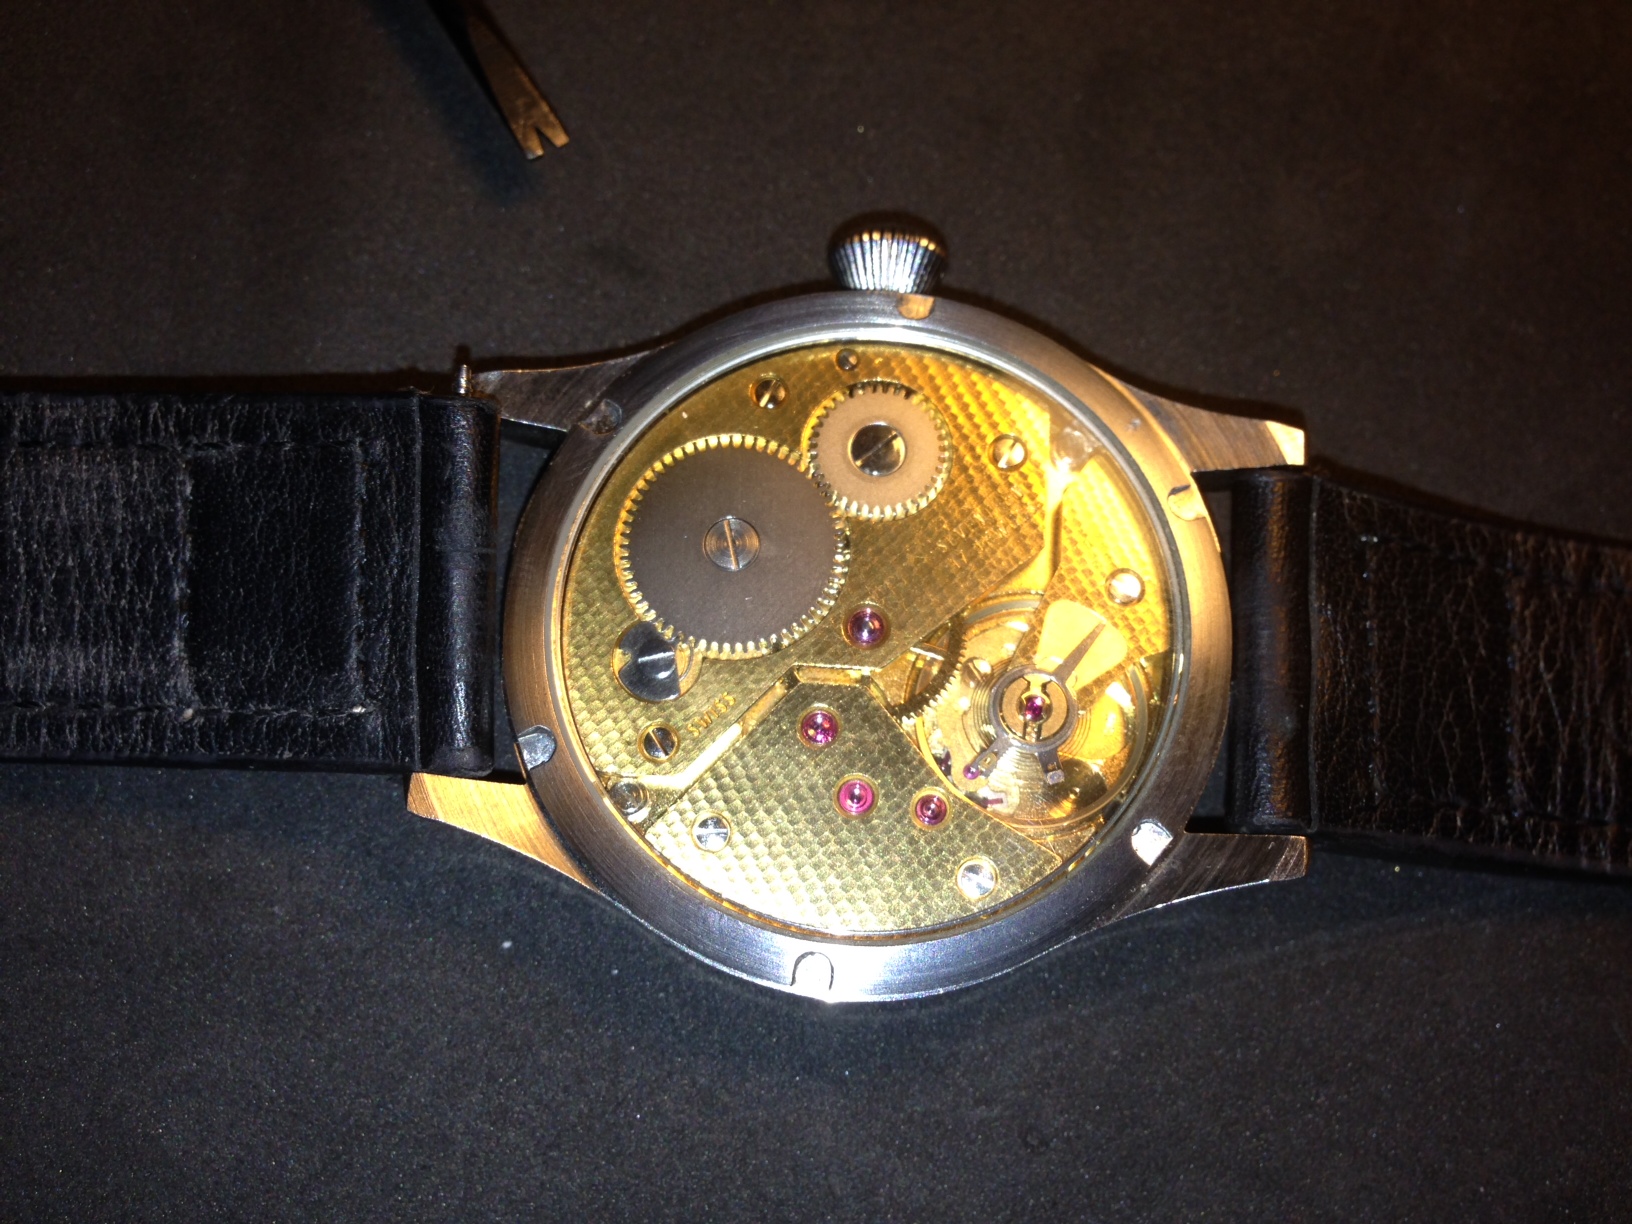
Use your spring bar tool to attach the strap with the buckle to the top (12 o’clock) position. Then attach the second strap and you’re done!
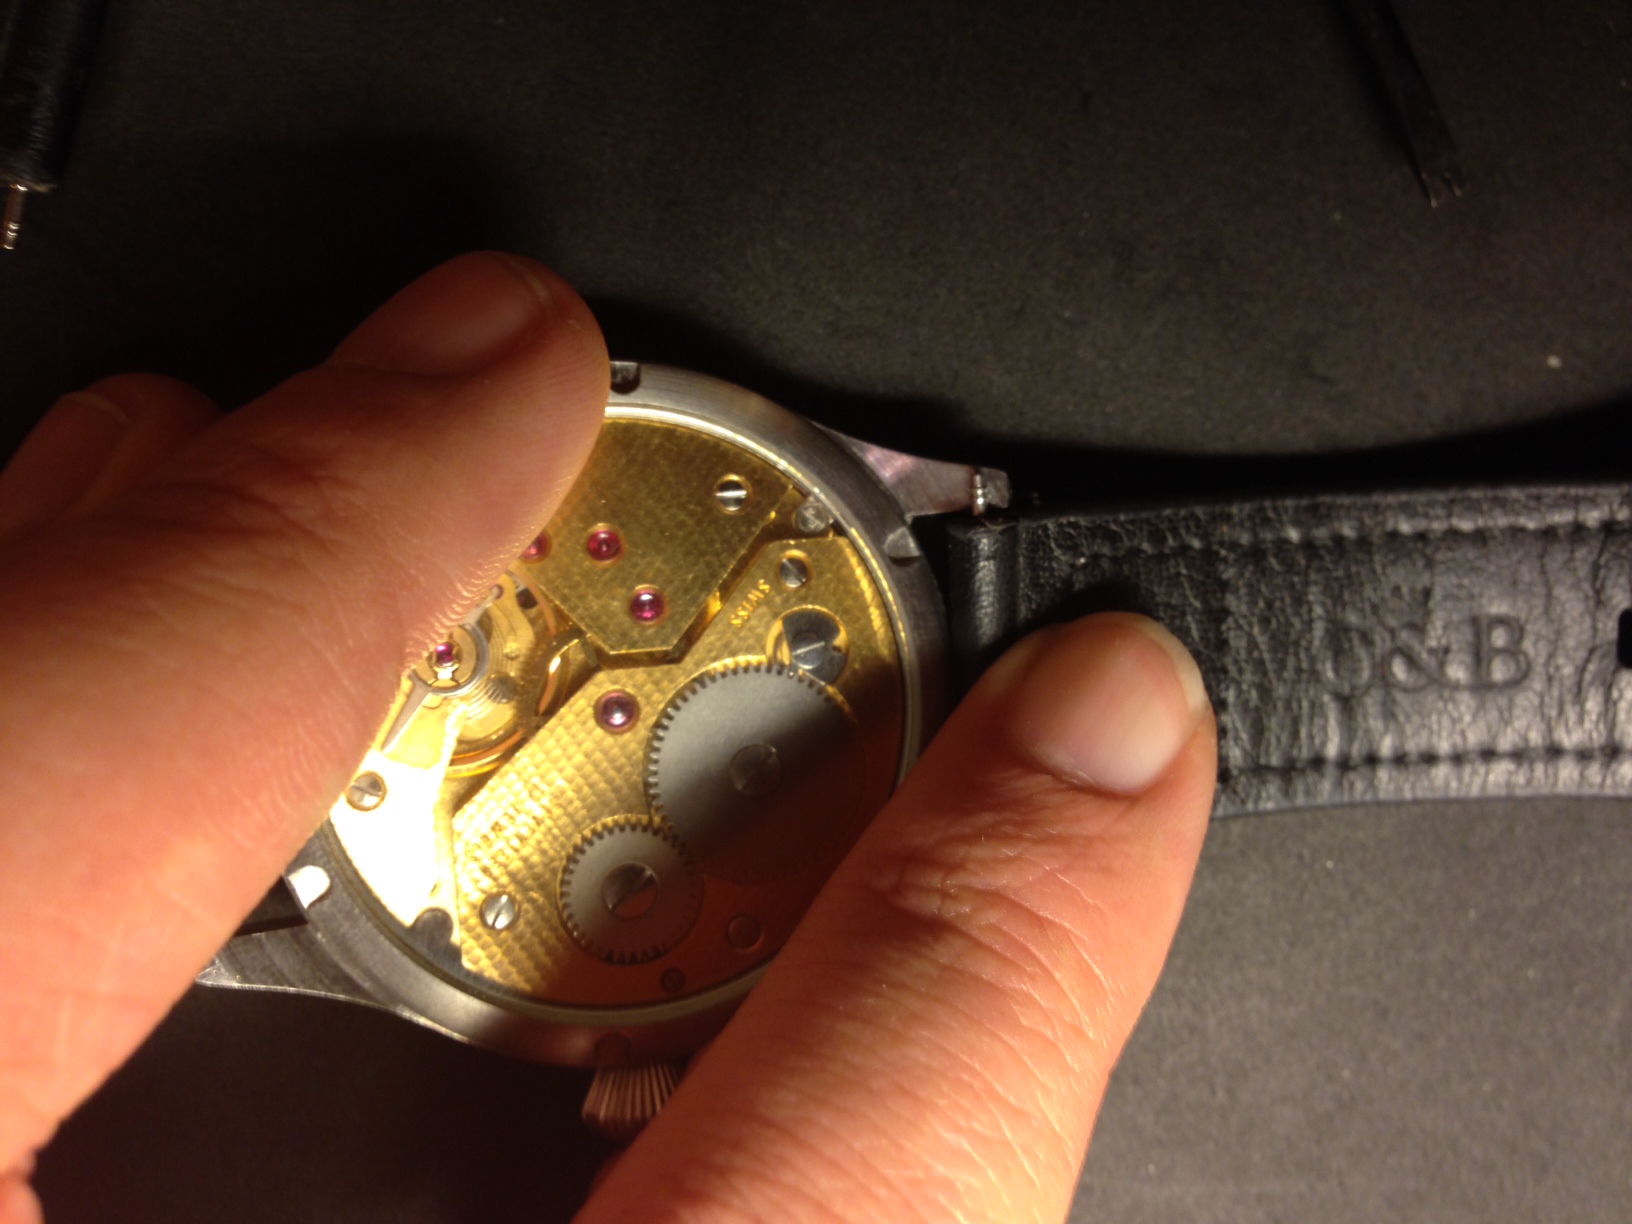
Congratulations! You are now the proud owner of a high quality bespoke Flieger-style watch for a fraction of what you would pay retail. I tallied my costs and this build came out to roughly $300.00. Not bad considering the closest Flieger-style watch with an ETA 6498/97 movement was the Stowa Klassic which starts at $1200.00. Sure, Stowa has a rich history, but that isn’t worth another $900.00 to me.
Thank you for the great tutorial and nice job! The finished product looks wonderful! I’m thinking about sourcing a similar flieger-style watch using that dial.
A couple questions if you don’t mind: I appreciate a very strong, nice lume. What’s your opinion of the lume on this dial in terms of brightness and duration? Do you like the ‘sunburst’ effect of the dial? From the pictures I’ve seen online, it seems like the color/tone changes quite a bit depending on lighting. Do you have any experience with the blue version of this dial?
I also noticed that you started off with black hands then switched to silver hands for the last two pictures. Just curious if you think the silver hands offer better contrast or if there a different reason for the switch?
Thanks again!
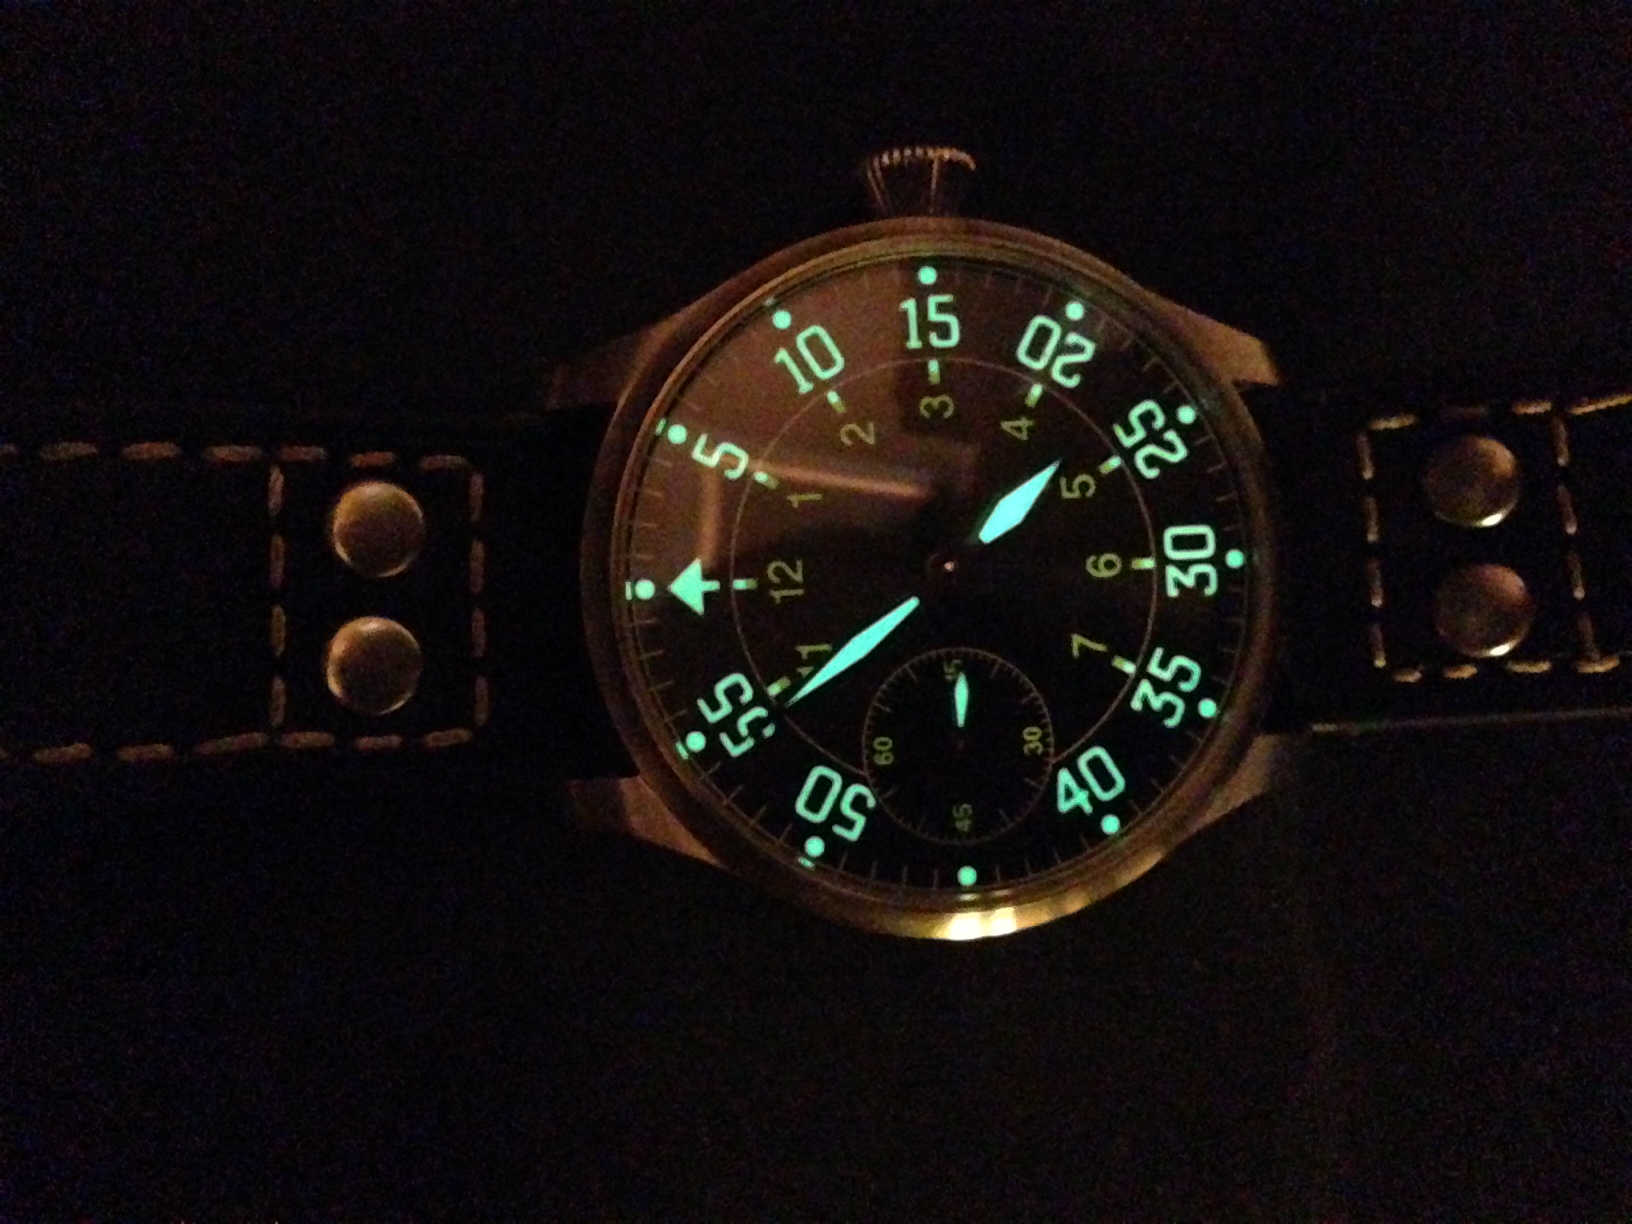
Hi Scott! Glad you found the tutorial helpful. Yes the lume is plenty bright on the dial and on the hands. That is something I was actually a little worried about when ordering the parts, but I was pleasantly surprised by the lume. It isn’t the brightest lume in my watch collection, but it is still plenty bright.
The sunburst pattern is more subtle than you might think. Under diffuse indoor lighting you won’t notice it too much, but when you go outside or have it under direct lighting it really starts to dance around. I can see how some people might think it is too flashy for a Flieger style watch, but I like it. I have seen the blue version of the dial and it looks great at well. I was thinking about making another watch and incorporating the blue. I will say that the sunburst pattern is more noticeable with the blue version for some reason.
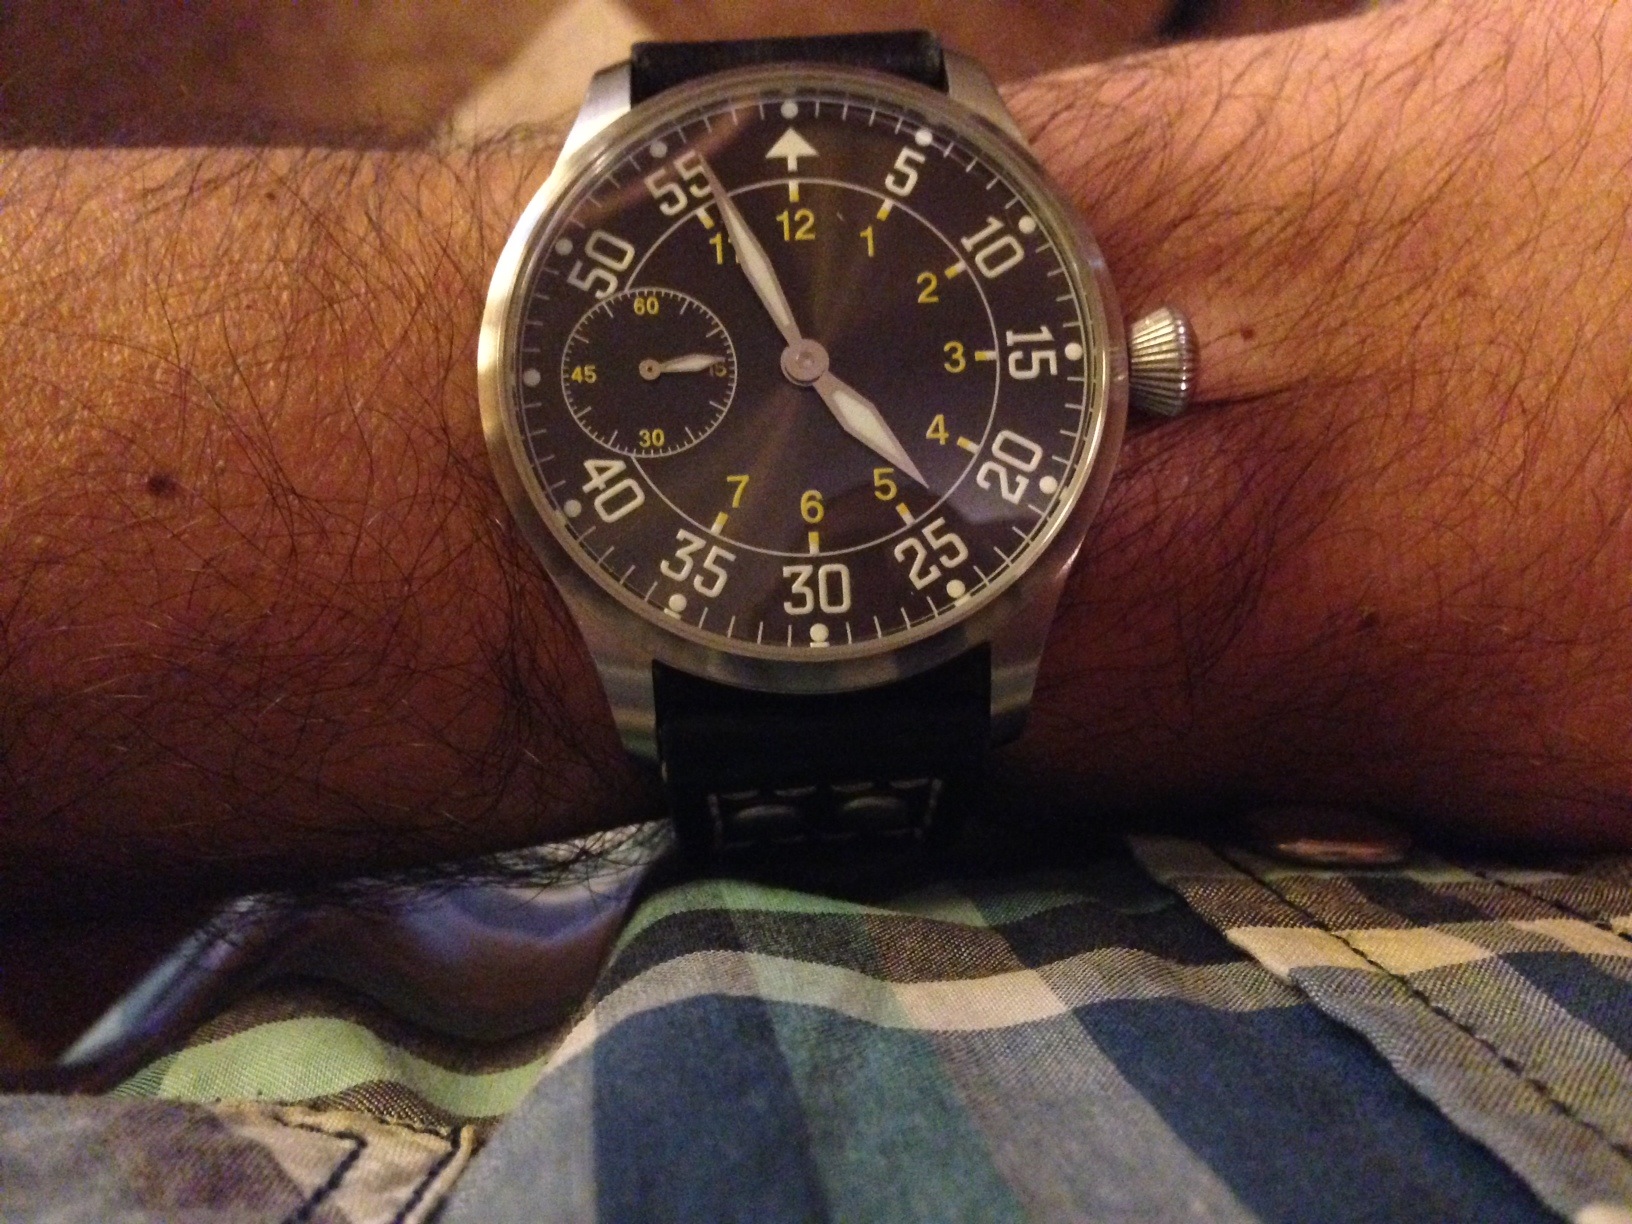
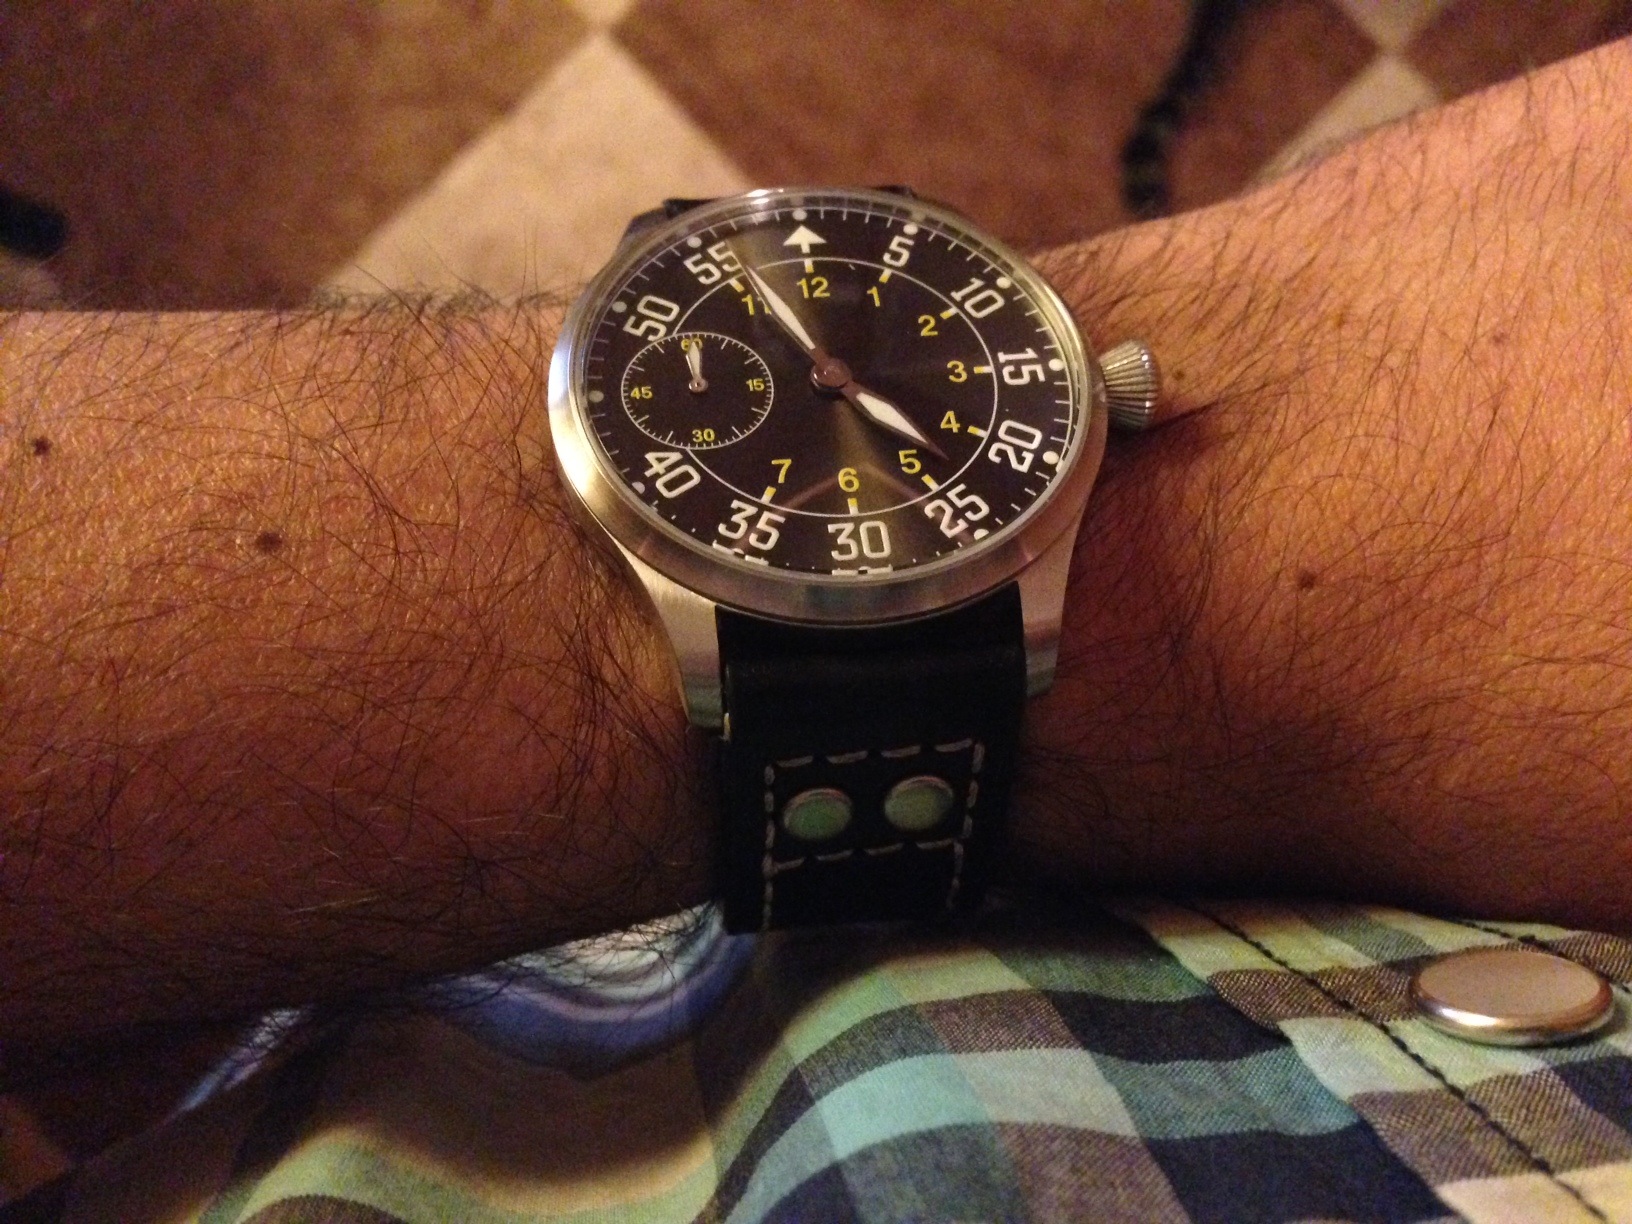
The hands look black in the first bunch of photos, but they’re actually a highly polished silver. I went with silver on the hands to tie in with the brushed steel case and the rivets in the band.
Nice photos and an even better tutorial! Well done and thank you. Looking forward to your future projects, keep us posted!
Thanks for the reply and very informative!
Great guide! I’m thinking of trying this myself, but I have some questions that I would like to ask you. If it’s ok with you I would like to send you a mail. If so, do you have an address that I can use? If you don’t want to write your address as a comment I would really appreciate if you sent me a mail to my attached address.
Many thanks!
Fredrik
Thanks for your post
I’d like to ask you about lume quality from helenarou, does it last long? 1h or 4-5 hours? Can you give me more detail about lume from your pov? Thanks again
The lume is bright but not terribly long lasting. Even so, there is a lot of it and it’s easily legible in very minimal light. I’d give it a 6 out of 10.
Really cool and well done tutorial! I’ve been looking for blogs like that for a while but none of them was as good as yours!
Great job!
Hey nice instructions I have been looking into building my own watch. If I got a movement off of eBay like a really nice one. How will I know what case and stuff to get? I don’t want a leather strap I want a stainless steel band.
Hi Jason,
If you are looking on eBay, make sure you include the type of movement in all of your searches. So for example if you are making a Flieger watch like I did with an ETA 6497 movement, you can search for “6497 dial” or “6497 hands”. That’s the easiest way to narrow your results and make sure you are buying compatible parts.
Hi,
Thanks for the great tutorial, I am trying to build my own watch as well now.
I have all the parts, and installment of everything went ok, only the mounting tabs i find dificult, you have any golden tips as to how to install them?
I use an asian copy 6498 as i wanted to try first before investing to much.
Thanks!
Hi Marcel,
Make sure you are installing them right side up. The flat end should be poking down into the depth of the watch and sitting flush with the retaining ring of the movement adapter. Also, don’t be afraid to bend them if they don’t make contact properly. They are generally sold as a one-size-fits-all solution to various different movements, even though some movements are much thicker than others. Don’t be shy about modifying them to make sure they fit your 6498!
This is simply perfect! Thanks for taking the time to post this.
Hi there,
Very informative post.
Quick question, what Case size did you order?
The link you supplied takes us to a page with 43mm cases, however the dial (39mm) only fits 44mm-47mm.
thanks
Sorry, I didn’t look hard enough, I’m assuming you order a 45mm case?
Hi Zach,
Thanks for pointing that out. Yes, I used a 45mm case.
Hi, great tutorial and great looking watch, especially the sunburst dial. I recently bought my first B-Uhr style watch with a 6497 movement and was looking to replace the dial it came with, the ”lume” last about a total of 5 seconds and even then you must have night vision goggles to see it so it has to go. I was looking to build my own but found it was cheaper to buy the complete watch and swap out the dial, hands and strap, which of course will require a complete tear down of the watch and I really like the brown sunburst from Helenarou so this really helps. The 6497/8 is new to me, I’m accustomed to 2824-2’s and such so I was completely unaware of the set screws holding the dial and stem so this tutorial saved me a lot of frustration… I wanted to comment though about cutting the stem and suggest what I think is a much easier way to cut it to length without any guesswork, it might help out whoever reads this who might not know this simple little technique as well… If you install the uncut stem with the crown installed and put it in the winding position, you can then use a caliper to measure the distance between the crown and case, that will give you the exact measurement of how much you need to cut off, it can save a great deal of time and frustration trying to fiddle around with it cutting and checking and then rechecking and filing etc. the same can also be done if it’s a screw down crown, just install the stem like before and then push it all the way in until it stops, make the measurement and then cut, works perfectly every time. Thanks again for the tutorial, I think I’m going to go buy that dial and a handset now and get to work!
Great tip! You’re right, with something as small and delicate as a watch it generally isn’t the best idea to eyeball it. Especially if you don’t have a replacement stem on hand. Calipers are a great addition to any watchmakers tool kit.
Hi there! I am planning to make a patek phillipe calatrava homage. I am looking at making one within a budget of $100, do you think it is possible? Also, where can I look for more watch cases? And how do I ensure my movement fit the case to prevent any rattling?
$100 is pretty tight, but you could probably get something close to the look of the Calatrava for that. eBay is going to be your best bet. I would start by finding a dial that you like. The listing for the dial should say what movement it fits (like eta 2824). Then, once you have the dial picked out, you’ll want to find a the movement. eBay is also you best bet for that. You’ll have to go with a Chinese clone movement to stay within budget. Then after you have the dial and the movement picked out, you’ll need a case and hands that will also fit that movement. As long as you pick parts that are listed as fitting together (with whatever movement you go with) you shouldn’t have too much trouble. Lastly you’ll need a band. You could try eBay for that as well, or if you want to spend a little more I really like the bands at CrownAndBuckle.com
Good Luck!
Great instructions and pictures! What size screwdrivers did you use to put together your watch?
Thanks! Glad you enjoyed it. I use this Bergeon 9-piece screwdriver set. The blades on the screwdrivers range from 0.50mm to 2.50mm.
Thanks Luke! I have a specific question regarding your instructions and photos. Can you please email me?
Amazing job, I am gonna create this as soon as I go home, I will ask any questions later.
Hi, I’m looking to build a watch like this but with a 2824. How would you compare the case and dial quality to a Hamilton khaki or seiko sarb? Thanks
Hi Adrian,
Good choice, the 2824 is a great movement. I used to have a Hamilton Khaki and I would say the case and dial are of a similar build quality. They are both milled out of a single piece of stainless steel and the fit and finish on this case was actually much better than I expected coming from a third party Chinese source. I cant remember if my Khaki had a sapphire crystal or not, but it’s nice that that is an option here (and for only 40 dollars more).
Good luck on your build!
Thanks for your post
I’d like to ask you about lume quality from helenarou, does it last long? 1h or 4-5 hours?
I would say it’s closer to 1-2 hours longevity.
thanks admin Great instructions and pictures! What size screwdrivers did you use to put together your watch?
I used a variety of sizes as some components require smaller screws. I have this set of screwdrivers from Bergeon: http://amzn.to/29vF4d0
I’d say I used the 1.2mm, 1.4mm and 1.6mm mostly for this project.
How do tell what Asian movements are clones, and how do you tell the measurements for the cases?
Hello,
Thank you for the wonderful tutorial!
Just a few questions, If I were to buy a Rolex watch face, what ETA would you recommend?
Hmm, that’s something you would probably have difficulty pulling off. Rolex produces all of their movements in house and doesn’t source any movements from ETA, so if you were to get your hands on a Rolex dial, it likely wouldn’t line up properly with any ETA movement. Things like date windows, dial feet, pinion diameters on the dial, etc, etc, could all potentially require modification. You’re probably better off shopping around for a Rolex homage with an ETA movement. There are plenty out there to choose from.
Great tutorial with excellent instructions and photos. I am inspired to give this a try as a first project. Full disclosure, I am a complete novice and have a basic question. Are the Unitas 6497/6498 movements available from Otto Frei interchangeable with the ETA 6497 movement you used in your tutorial?
Unless I am missing something the ETA movements are now quite a bit more expensive than when you first wrote this in 2014 and I gather that the Unitas movements are made by ETA. I thank you in advance for your reply
Hi Stephen,
Yep, the Unitas 6497/6498 and ETA 6497/6498 are identical in all respects except name and branding, and I believe ETA even began stamping newer Unitas movements with their logo; so even in that regard, they are identical. Go ahead and save some money on an older Unitas movement and put those savings towards a good set of screwdrivers or tweezers. It’ll make the assembly much more enjoyable, and you’ll be ready for your next project as well.
Another option would be to buy a 6497/6498 clone off of eBay. Seagull makes a decent movement that is a quarter the price of the ETA/Unitas versions and is identical in construction. It won’t be quite as robust and well-made as the Swiss offerings, but if you are looking for something to get your feet wet, it could be a good alternative. Good Luck!
Luke, thanks for the additional information which helps quite a lot. The Seagull movement suggestion is not something I would have considered owing to mixed reviews that I read about the Asian clones though not about Seagull in particular. Your description that these are decent movements makes sense for a first build. Do you or others have a trusted source for an “authentic” Seagull movement? Ebay listings seem to be all over the map. Again, your tutorial remains one of the best I have found.
Yep, eBay can be risky for Chinese movements. You never really know what you’re going to get. I’ve bought Seagull movements from Ofrei.com, but it looks like they don’t carry them anymore. I think your next best bet would be http://www.cousinsuk.com. You’ll have to make an account (and pretend to be a watchmaker) before you can browse their movements, but they do sell Seagull movements, which are sourced directly from the Seagull factory. Good luck!
Luke, thanks for the link to cousinsuk.com. I think I will still go with a Unitas 6498 movement over the Seagull despite the cost. I want this to be a first build that I can hopefully rely upon. I know one could buy 3 Seagull 6497/6498 movements for one ETA/Unitas but maybe one gets what one pays for…..
>I have a seagul is no good.
It goes fast as 15 seconds/hor.
Doesnt get the enought energy in order not to stop at night, well and head headheck..dont know if it is good idea even to fix it, thats sems no to have a fix but goes trash.
Accidentally found your tutorial while I’m looking for a DIY watches. I’m a newbie into DIY watches. I bought a cheap Seagull ST6 cheap in ebay and after I received the movement, I found that finding DIY parts for ST6 is pretty difficult, especially watch hands and dial. Do you have any suggestion I can get alternatively? For example what movement are similar with ST6?
Sorry for my English because of English is not my mother language.
Thank you.
Hi TM,
I’m not familiar with the ST6 movement specifically, but as long as you find hands that will fit the pinions on that movement, you should be fine. When looking for parts online they will list the size of the hands (both the lengths and the diameters of the openings).
The hand fittings for the ST6 are Hour = 1.34; Min = 0.835mm; Sec = 0.22mm
Hi Luke,
This tutorial is fantastic; thank you so much for taking the time to put it together. As someone who has next to no knowledge about watch construction, could you provide some resources to better understand various movement, case, dial and hand combinations? I’d love to be able to see what combinations are possible together. Thank you so much.
Hi Gabe,
Glad you found the tutorial helpful! eBay is actually a pretty good resource to browse dial, hand and case combinations for a particular movement. Your best bet would be to settle on a movement you like and use that as a basis for your eBay searches. The ETA 2824 is a popular movement and searching “ETA 2824 Dial” should give you hundreds of options. Repeat this process for the hands and case and you should be all set. I would suggest using the ETA 2824 or Unitas 6497 or Unitas 6498 as your movements around which to build your watch as they have the most options it seems.
The other option is to order parts from watch industry suppliers such as ofrei.com , cousinsuk.com or startimesupply.com. Going this route can be a cumbersome process and you will likely have to cross reference a lot of tiny measurements to make sure everything works together.
Good Luck!
You mentioned the movement adaptor. Is that included with the case?
What tools are required to assemble a watch?
Yep, the movement adapter will be included with the case.
As for tools, it depends on how complex you want your watch build to be. At the bare minimum, I would recommend the following:
– A good screwdriver set. (I like Bergeon, but they are expensive)
– A nice pair of precision tweezers. (again, I use Bergeon tweezers)
– A quality spring-bar tool. (I use a Bergeon 6767-F with an S tip on the other end)
– A case-back opener. (search Amazon for Jaxa case back opener)
If you are going to case a pre-assembled movement, add a dial/hands and a strap, you could get away with a pretty minimal investment in tools. Other tools such as a hand setter, crystal press, loupes, etc. are all nice to have and make things easier, but they aren’t strictly necessary for a simple watch build.
Good Luck!
Hi Luke,
Great tutorial!
I’m having a really hard time finding watch cases in general. Every time I google it, I keep getting jewelry boxes. Can you recommend some companies that sell cases? I would greatly appreciate it!
Thanks to you I found HelenRou but is there more?
Hi Vincent,
Of course! Unfortunately, cases can be especially difficult to find.
Here are some resources you could try:
http://www.startimesupply.com
http://www.ofrei.com
http://www.cousinsuk.com
I’ve ordered parts from each without any problems. You’ll have to set up an account with Star Time to order from them, but Otto Frei and Cousins UK will sell to individuals. Good luck!
Hey Luke!
I love your tutorial. However, i have a few questions. When installing the hands, does it matter at what position i install it? (I’m planning on building a clone 7751) Another question is that if i get a case meant for the 7751, would i need another tool to keep the movement in place other than the two mounting tabs? Also, did the hour wheel and dial washer come with the movement or did you have to buy them separately?
Thank you very much!
Chen~
Also, I wonder, what are the other name of the clones of 7751. I believe that Shanghai has a clone, but i don’t know the name.
Thank you!
Hi Chen,
Glad you are finding the tutorial helpful! Yes, the position that you install the hands is important. It’s usually best to install them all at exactly 12:00, that way when the minute hand is at the 12 position, the hour hand will be pointing directly at each hour marker (and not half way between them). If you don’t install them this way, the hour hand and minute hands won’t agree as they rotate around the dial. The same is true for the second hand, though it is less important on a sub seconds layout like this one.
You shouldn’t need anything special for a 7751. A chronograph is going to be more complicated to put together (more hands!), but the basic assembly should be the same. Make sure the case you buy comes with a movement adapter, and get a pack of movement tabs and you should be good to go.
The hour wheel and dial washer will come with the movement, but be careful you don’t lose them because they are loose and can fall out during shipment.
Hope that helps! Good luck.
Hi Luke, excellent tutorial! The mounting tabs are killing me though! Did you hammer them in? They do go between the case and the movement adaptor? It doesn’t seem to fit….but without them the movement shifts around! Advice?
Thanks!
Ben
Hi Ben,
Are the tabs too long or not long enough? If they are too long, you can just snip the tips off or file them down. I think I had to bend mine a little bit with a pair of pliers to get the shape correct. Also, make sure you have them going in the right direction. In the first photo the tab is actually upside down. It should be pointing down into the case and the curve should be hugging the perimeter of the movement adapter. I hope that helps. Good luck!
Hi Luke,
Thank you for the response. The length does not seem to be the issue. The issue seems to be the space between the movement adaptor and the case wall. While the movement moves around the width of the tab seems to be too wide to allow it to fit into the space between wall and adaptor. The space looks to be extremely small.
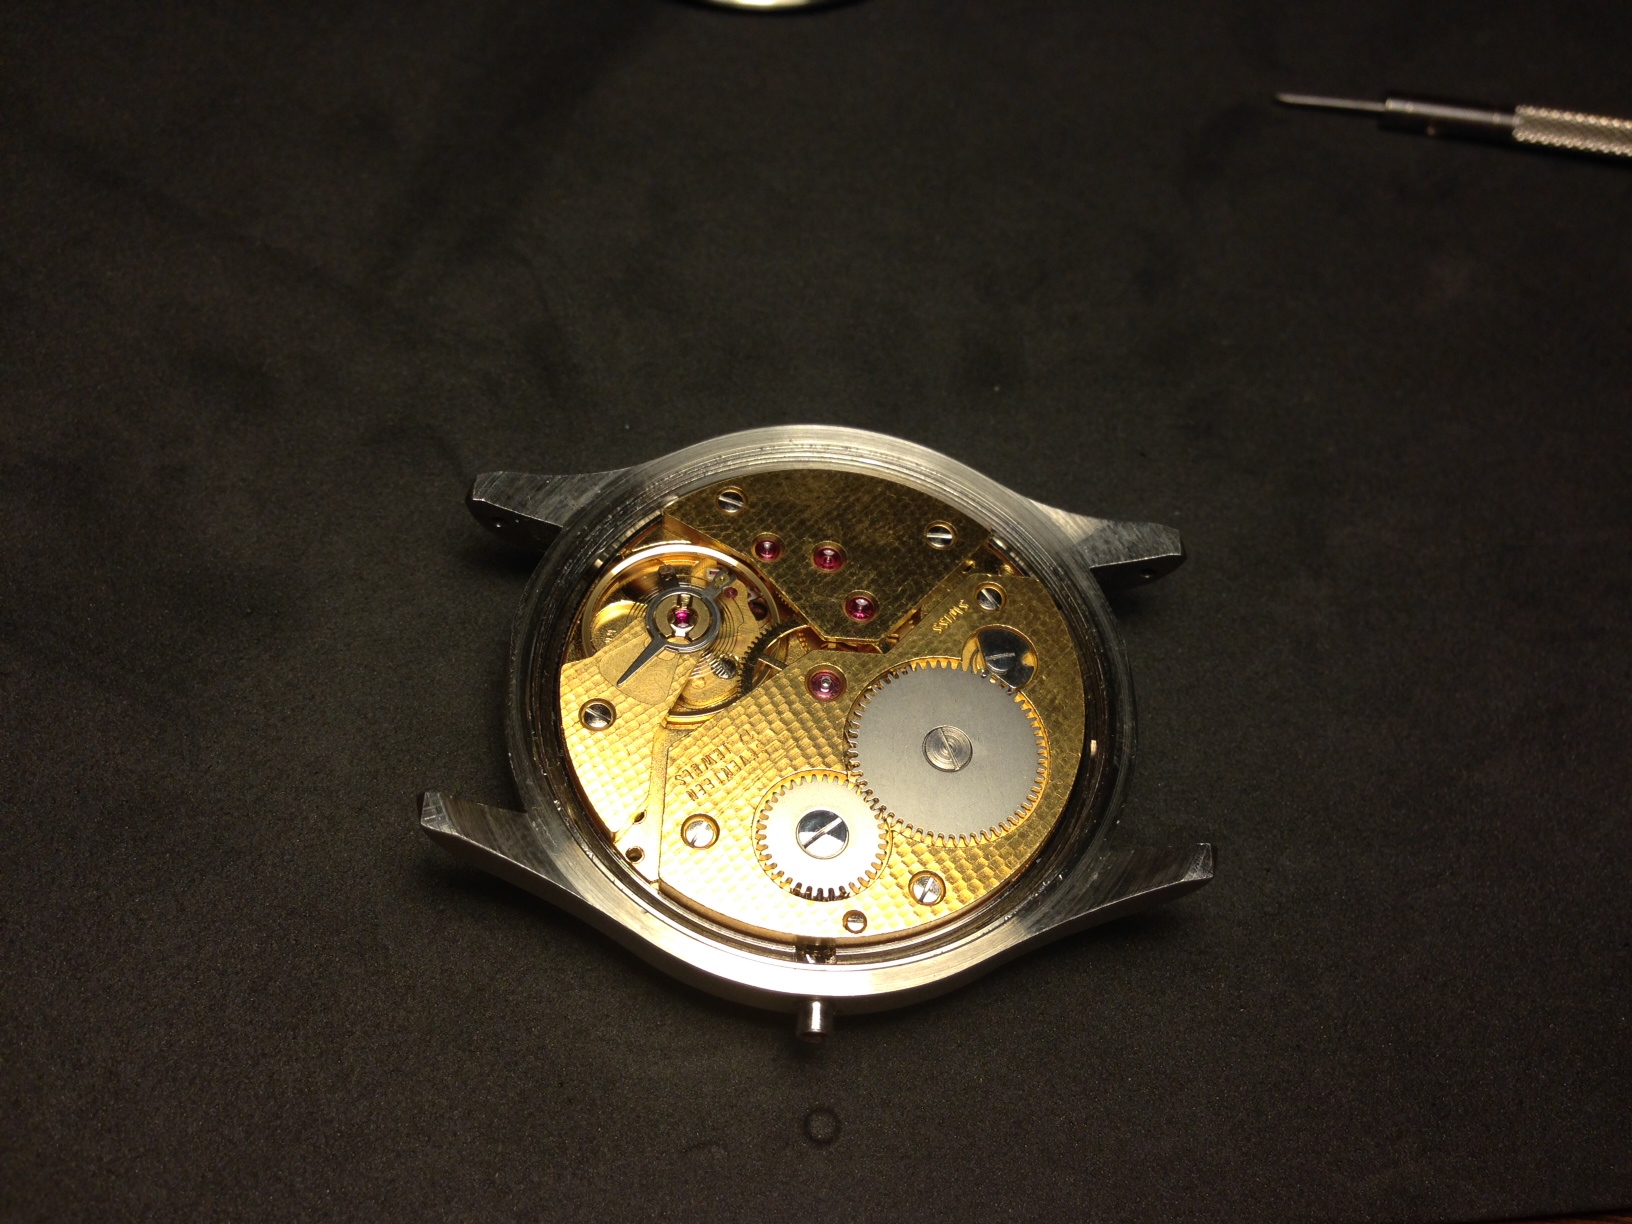
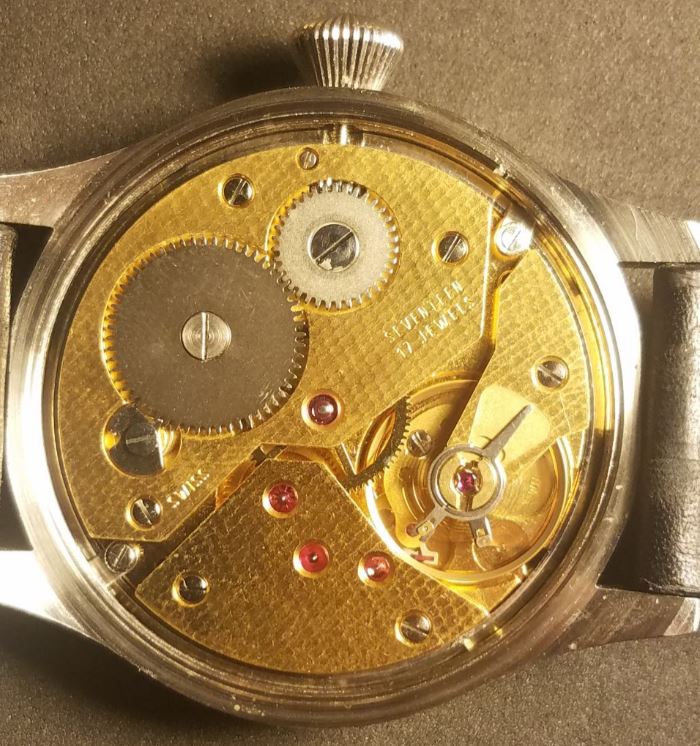
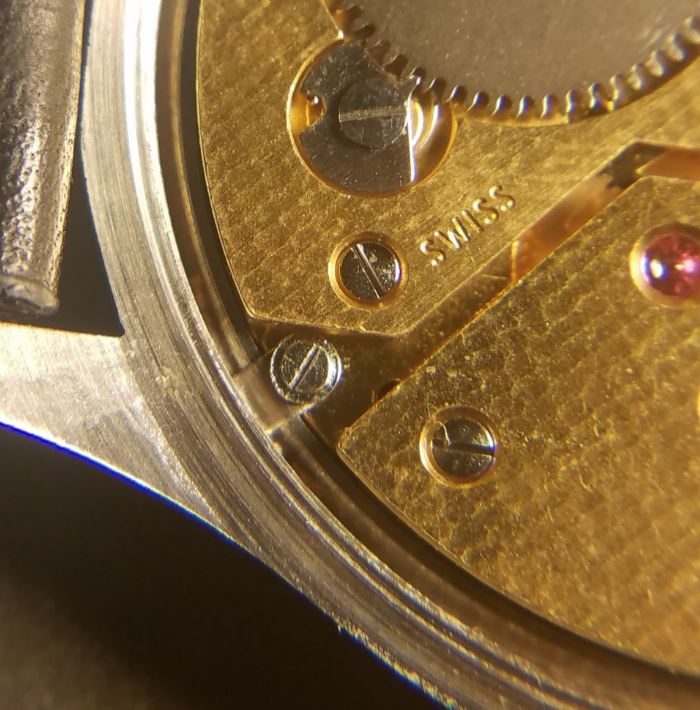
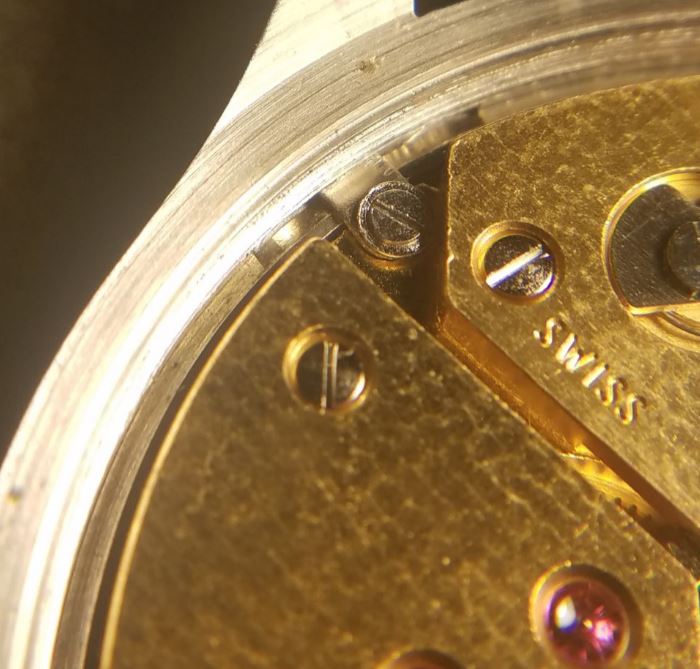
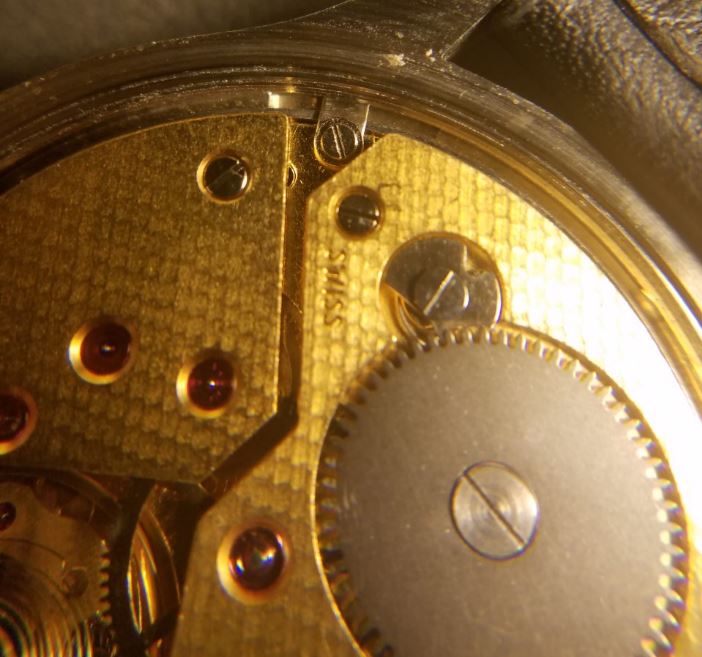
Hmm…that doesn’t sound quite right but it’s hard to say what is going on without looking at it. That said, I happened to be wearing mine today so I just popped the back off to take some pictures of the tabs and adapter ring. The adapter ring should fit snugly around the movement and the movement + adapter ring should fit fairly snugly inside the case. With the stem installed, all the tabs are really doing is providing enough friction to keep the movement from twisting within the case. Hopefully these pictures will help diagnose what is going on with yours!
Hi and thanks for your article! I really enjoyed it and decided to build my own mechanical watch. But other than you I would like to build an _automatic_ mechanical watch. The websites you listed as well as some more googling around show only a very small selection of automatic watch movements. They are either very expensive or you can’t find a watch case for it. Do you have any recommendations in this direction? This would be very helpful. I’d like to build a watch with a at least 42mm diameter case. Otto Frei has some chinese automatic movements but I can’t find cases for those. If anybody here has ideas what I can look for (at least 42mm, automatic, max. 300 bucks in total), I would be very thankful.
Hi Albert,
I think in this case, your best bet is going to be eBay. You can find a wider selection of cases, movements, hands and dials there than just about anywhere else. If you are looking to make an automatic watch, I would try searching for “eta 2824” or “eta 2836” movements. Those are both popular automatic movements that will get you the widest range of case, dial and hand options to work with. If you want to keep the price down, you can get a “clone” movement, which is just an identical Chinese version of the original. Good luck!
Hi, where would you say is a good place to find spring bars? Thanks!
Hi Will,
Both Otto Frei and Esslinger are good resources for spring bars. I have ordered multiple spring bar assortments from both and the quality has always been great.
I followed your instructions and assembled an ETA clone skeleton watch using a Seagull movement. When not worn, it keeps perfect time. When worn, the hour hand will skip several hours. I’ve unsuccessfully attempted to cause it deliberately by shaking my wrist, but it will only skip spontaneously. The hand isn’t loose. Any ideas as to a possible cause?
Hi Steve,
If the hour hand isn’t loose, then my best guess would be that the hour wheel itself is lifting up and jumping gears when you wear the watch. The hour wheel is held in place by a thin washer that pushes up on the back side of the dial and down on the hour wheel, so if there is too much space between the movement and the dial, that washer won’t make contact and can’t hold the hour wheel in place. You could test this by positioning the watch dial down and twisting it a couple times. If the hour hand jumps around, then that’s your problem.
To fix it you would need to pull the hands, then re-seat the movement within the case, making sure that it is sitting as low into the case and snug with the dial as possible.
what is the diameter of the final product?
44mm not including the crown.
Also, do u know of anywhere that sells parts compatible with Miyota movements? especially cases. They are really hard to find. Thanks
I think eBay is going to be your best bet for Miyota compatible cases and parts. ofrei.com has Miyota movement adapters that could be useful as well, but keep in mind that if you go that route, you’ll likely have to clip off the dial feet and use dial dots to attach the dial. Good luck!
Thanks for a very nice tutorial with excellent photos explaining each step. Thumbs up!
Andy
http://www.customwatches.co.uk/
Hi, Luke,
If possible, could you describe to me how you set the screws in place through the tabs that keep the movement in place?
I’m having a terrible time getting the screw in place and through the tab in a way that allows me to screw it down.
Thanks!
Ethan
Great tutorial, thanks. This has inspired me to have a go, so much good advice form someone who has actually done it. Many thanks
Peter
UK
Thanks for the awesome tutorial.
I’d like to give it a shot, but I’m interested in a Flieger B-Type dial face. Cannot find any such faces online. Any thoughts on where to look?
Thanks for the help.
Thanks so much for the tutorial! I tried it out and had some questions I was hoping you could help me on. For some reason, my hour/minute hands aren’t moving, even though the second hand is moving. Do you have any ideas on why that would happen? The only parts of the tutorial I deviated from was I didn’t put mounting tabs in (since couldn’t get them on and didn’t notice a difference without them), and I used a Chinese mimic of the movement. Do you think it could be an issue with the movement or the mounting tabs? Thank you again!
Great tutorial, but this would theoretically work for both automatic and chronograph watches right?
I’ve lost the second hand, then I realised I’ve bent the pinion it sits on anyway, now I’ve lost the tabs, the dial is scratched,,,it’s not that easy a job as you make out lol wonder if I should try again?
Hi A, did you try again, any success as I am having the same issues and would appreciate any advice?
I had the same problems as A, I can not put the second hand on and then I bent it, then I scratched the dial when putting on the other hands – the main issue is how on earth can i get the second hand on, it is so hard, please offer any help
Thanks for the great read. I loosely followed this to assemble my own watch with a manual wind movement. My case has a case tube so I didn’t cut the stem. I also didn’t have a loupe so placing the second hand was very difficult. I ended up taking a series of zoomed in photos with my phone to get the hand on. I used the end of a pen’s ink container to push down the hour and minute hands.